6 Github
6.1 What is Github?
Github is a version control space, meaning that it’s a place where you can share your code with others and keep track of who changes what, when, how, and whether it was a change that we would really want to keep. It enables you to share your code with the world, and can be an excellent way to build your CV. Moreover, if you want to get up and serious with your project, you can integrate Github with many other platforms such as Amazon and Google Cloud, creating fluent pipelines for you work. So, there are at least three main benefits to Github:
- It makes collaboration easier.
- It gives your work exposure and publicity.
- It can be an important component in integration with other platforms.
To work in Github, we need to first create a user account. Then, your team needs to create a repository that can be shared among you. A repository is a bit like a folder on Github.
6.1.1 Create a user account for Github
- Open https://github.com in a web browser, and then select Sign up.
- Enter your email address.
- Create a password for your new GitHub account, and Enter a username, too. Next, choose whether you want to receive updates and announcements via email, and then select Continue.
- Verify your account by solving a puzzle. Select the Start Puzzle button to do so, and then follow the prompts.
- After you verify your account, select the Create account button.
- Next, GitHub sends a launch code to your email address. Type that launch code in the Enter code dialog, and then press Enter.
- GitHub asks you some questions to help tailor your experience. Choose the answers that apply to you in the following dialogs:
- How many team members will be working with you?
- What specific features are you interested in using?
- On the “Where teams collaborate and ship” screen, you can choose whether you want to use the Free account or the Team account. To choose the Free account, select the Skip personalization button.
- GitHub opens a personalized page in your browser.
6.1.2 Create a repository
- Click on your profile button in the right hand corner of your Github screen and choose “Your repositories”.
- Click the green button “New”.
- Type a short, memorable name for your repository.
- Optionally, add a description of your repository.
- Choose a repository visibility. Here, you can pick “Public”.
- Under “Initialize this repository with”, choose “Add a README file”.
- Click “Create repository”.
Now, to add collaborators:
- Collect the Github usernames for the rest of the team.
- Navigate to the main page of the repository.
- Under your repository name, click Settings.
- In the “Access” section of the sidebar, click “Collaborators”.
- Click “Add people”.
Once the other collaborators have accepted the invitation to collaborate, everyone should be able to contribute.
Now, even though we have a shared Github repository, we still work and code in peace on our own computers. But whenever we make a change in the code and think it’s time to share it with the rest of the team (for example because we need feedback or because we believe a piece of code to be done), we can choose to (1) add the change to the Github repository, (2) commit to the change and (3) push the change. This is the general flow of working with Github.
How do we add, commit and push a change from our local computer to the Github repository? By cloning the repository to our computer. This is possible to do in the terminal, but we will here show you how to do it in RStudio.
6.2 Github and RStudio
Github can work with many platforms, including RStudio! To get there, however, the first thing we need to do is to install git, the system that allows us to work with Github from our computer. So Github is the version control space, and git is the version control system. Git can be downloaded from here: http://git-scm.com/downloads
You might have git installed already. You can check by looking at one of these places in your computer (depending on your operating system):
- Windows:
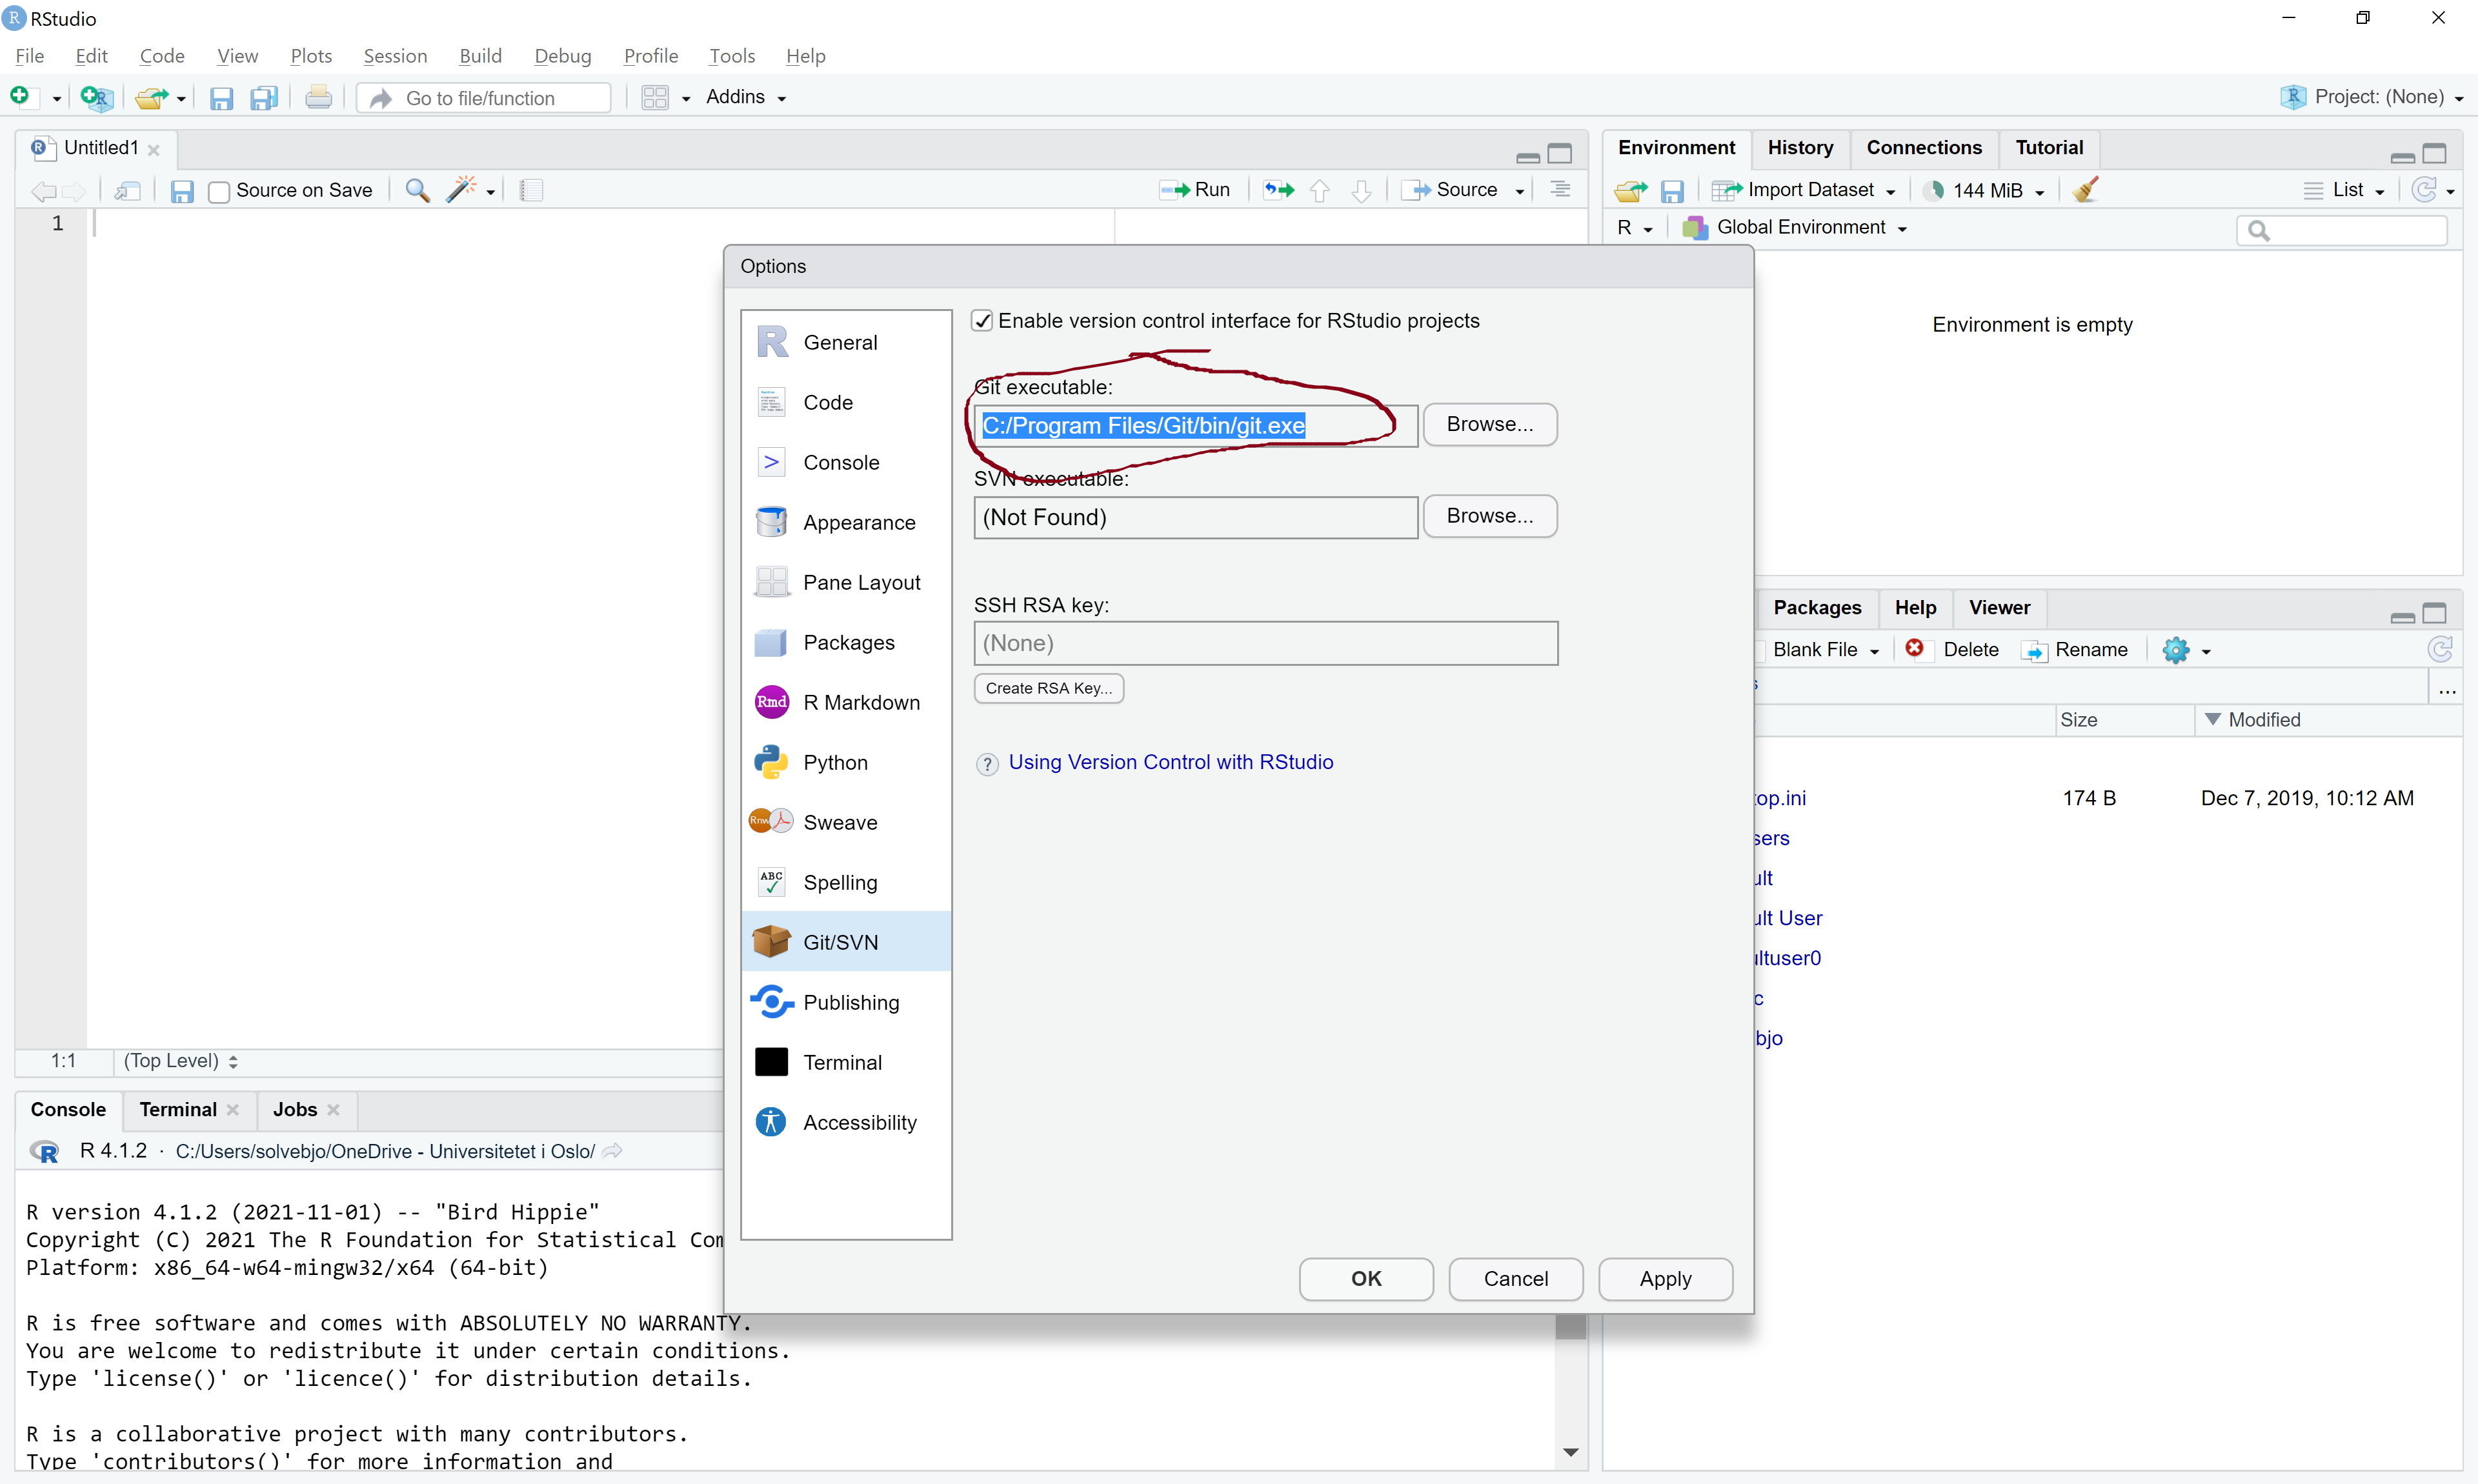
C:/Program Files/Git/bin/git.exe - Mac/Linux:
usr/bin/git
Once you’ve installed git, you’ll need to activate it in RStudio:
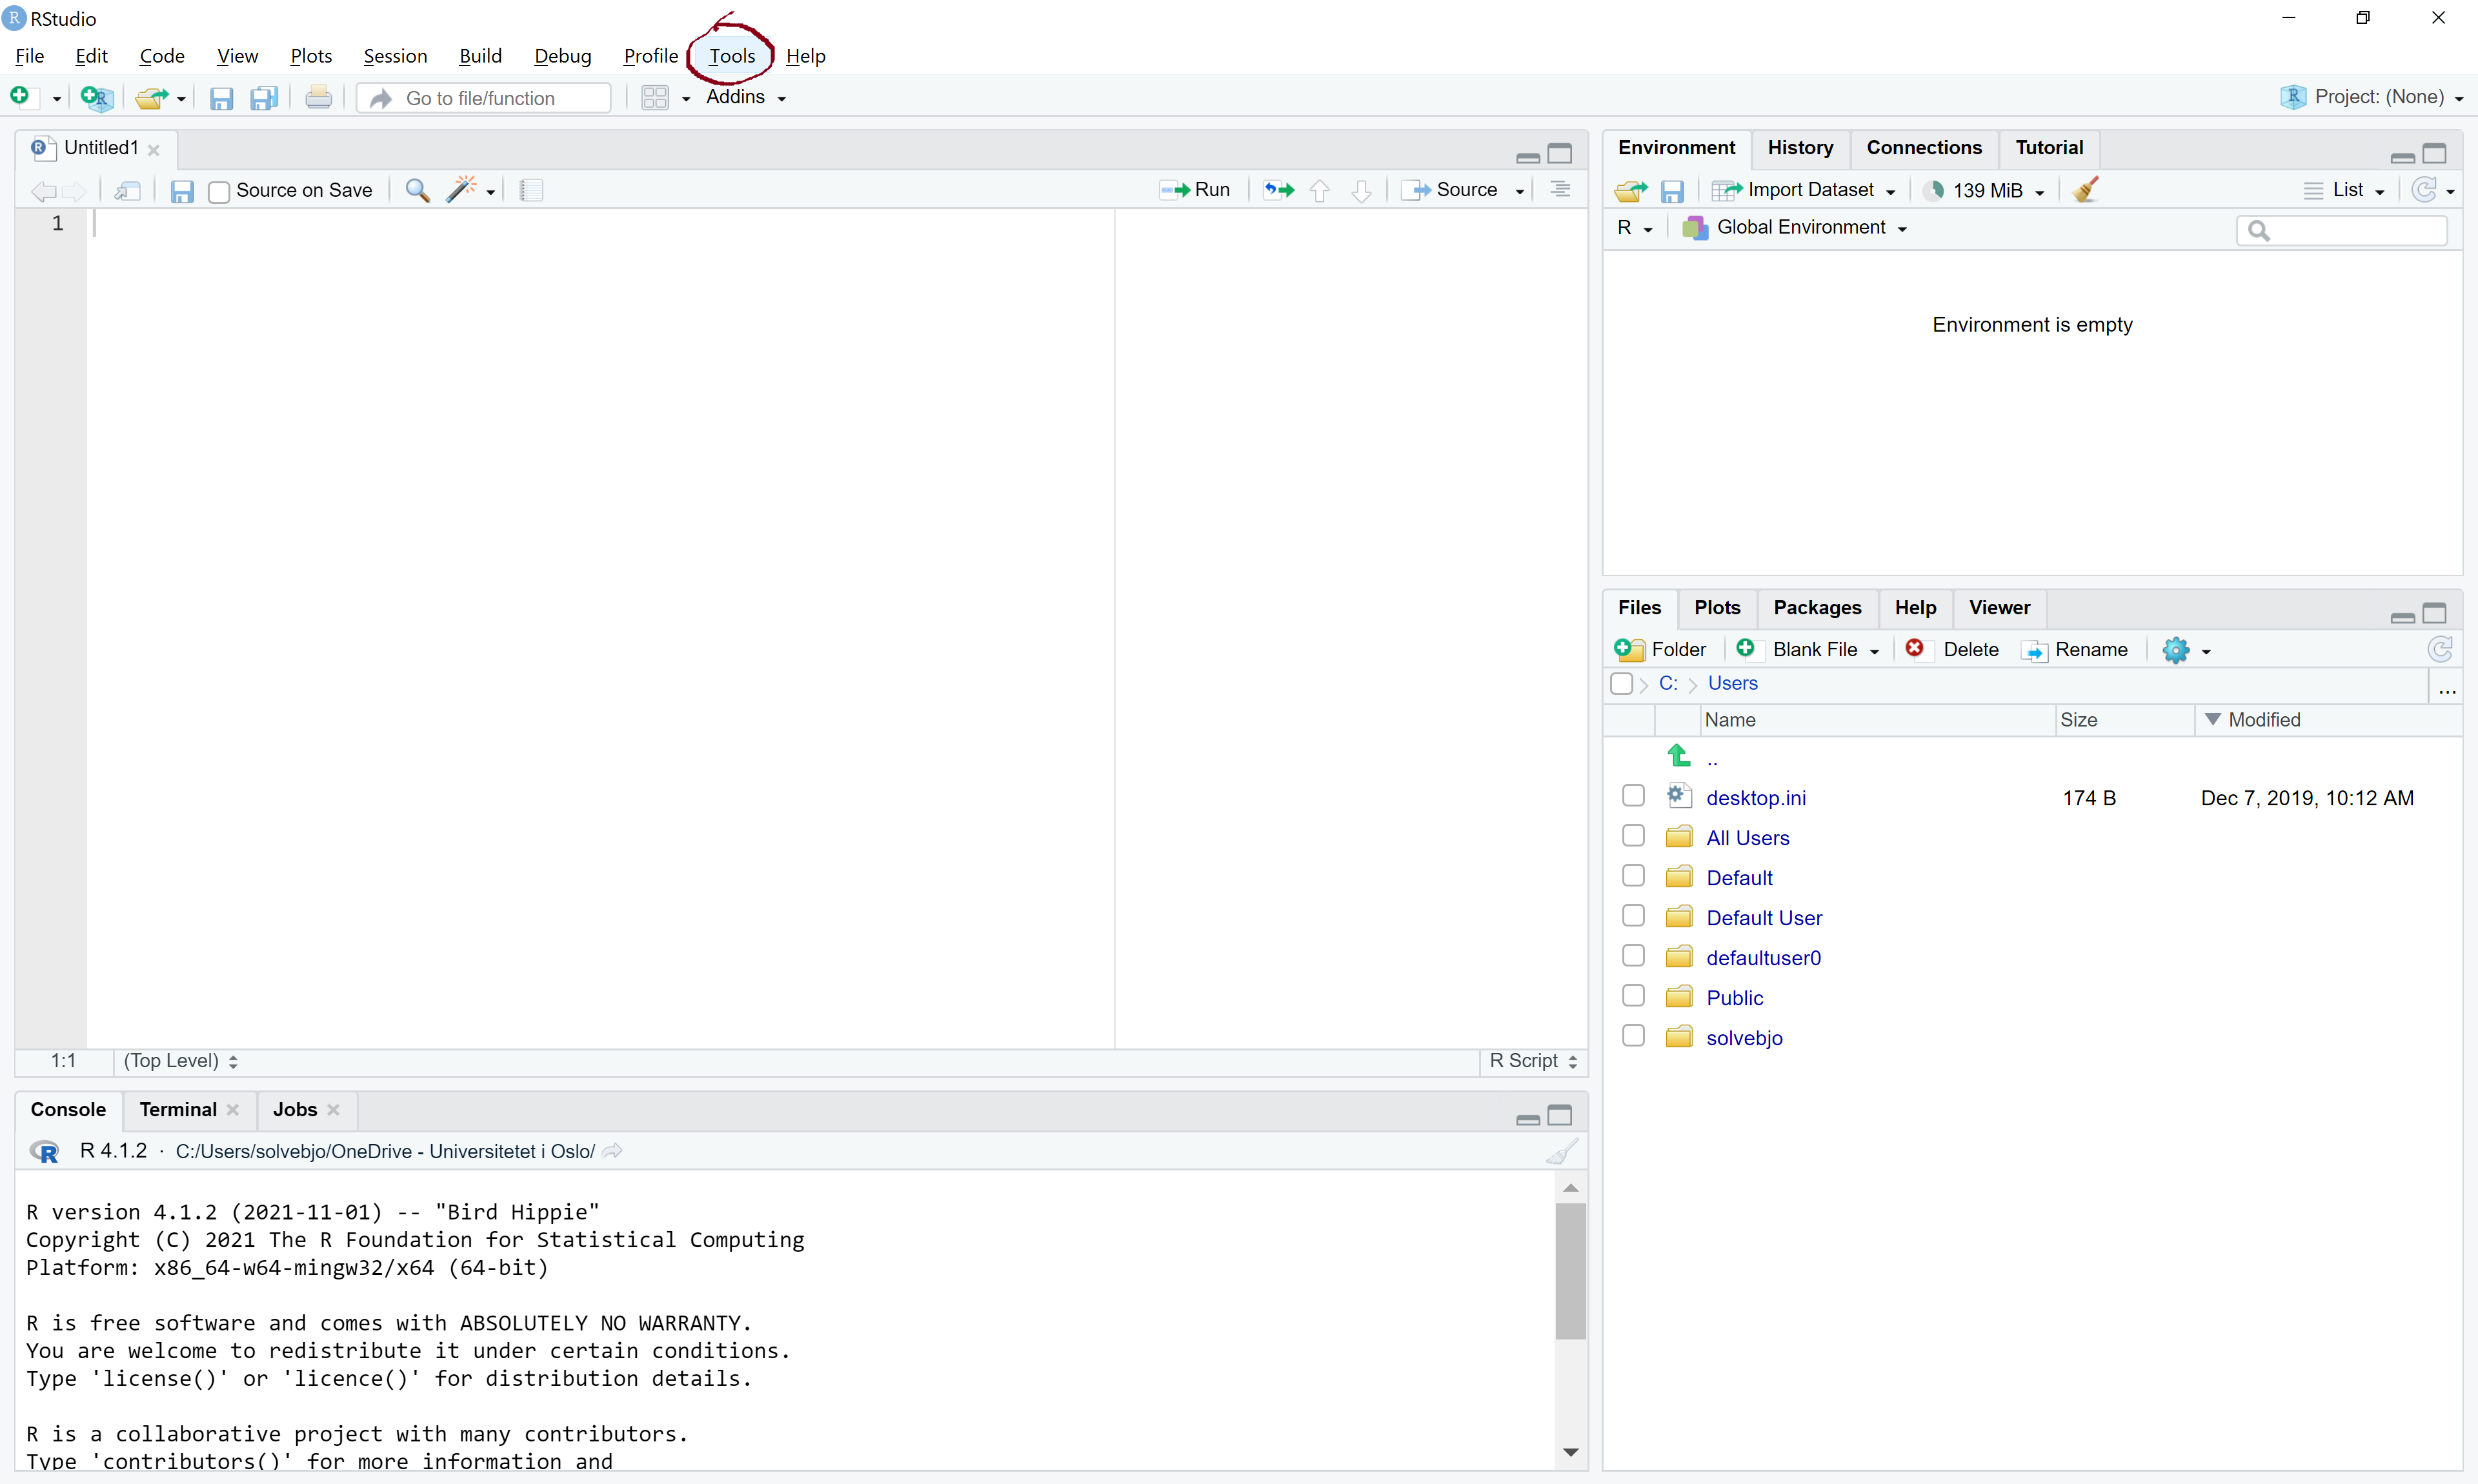
- Find the Tools menu in the top of the RStudio interface and go to Global Options.
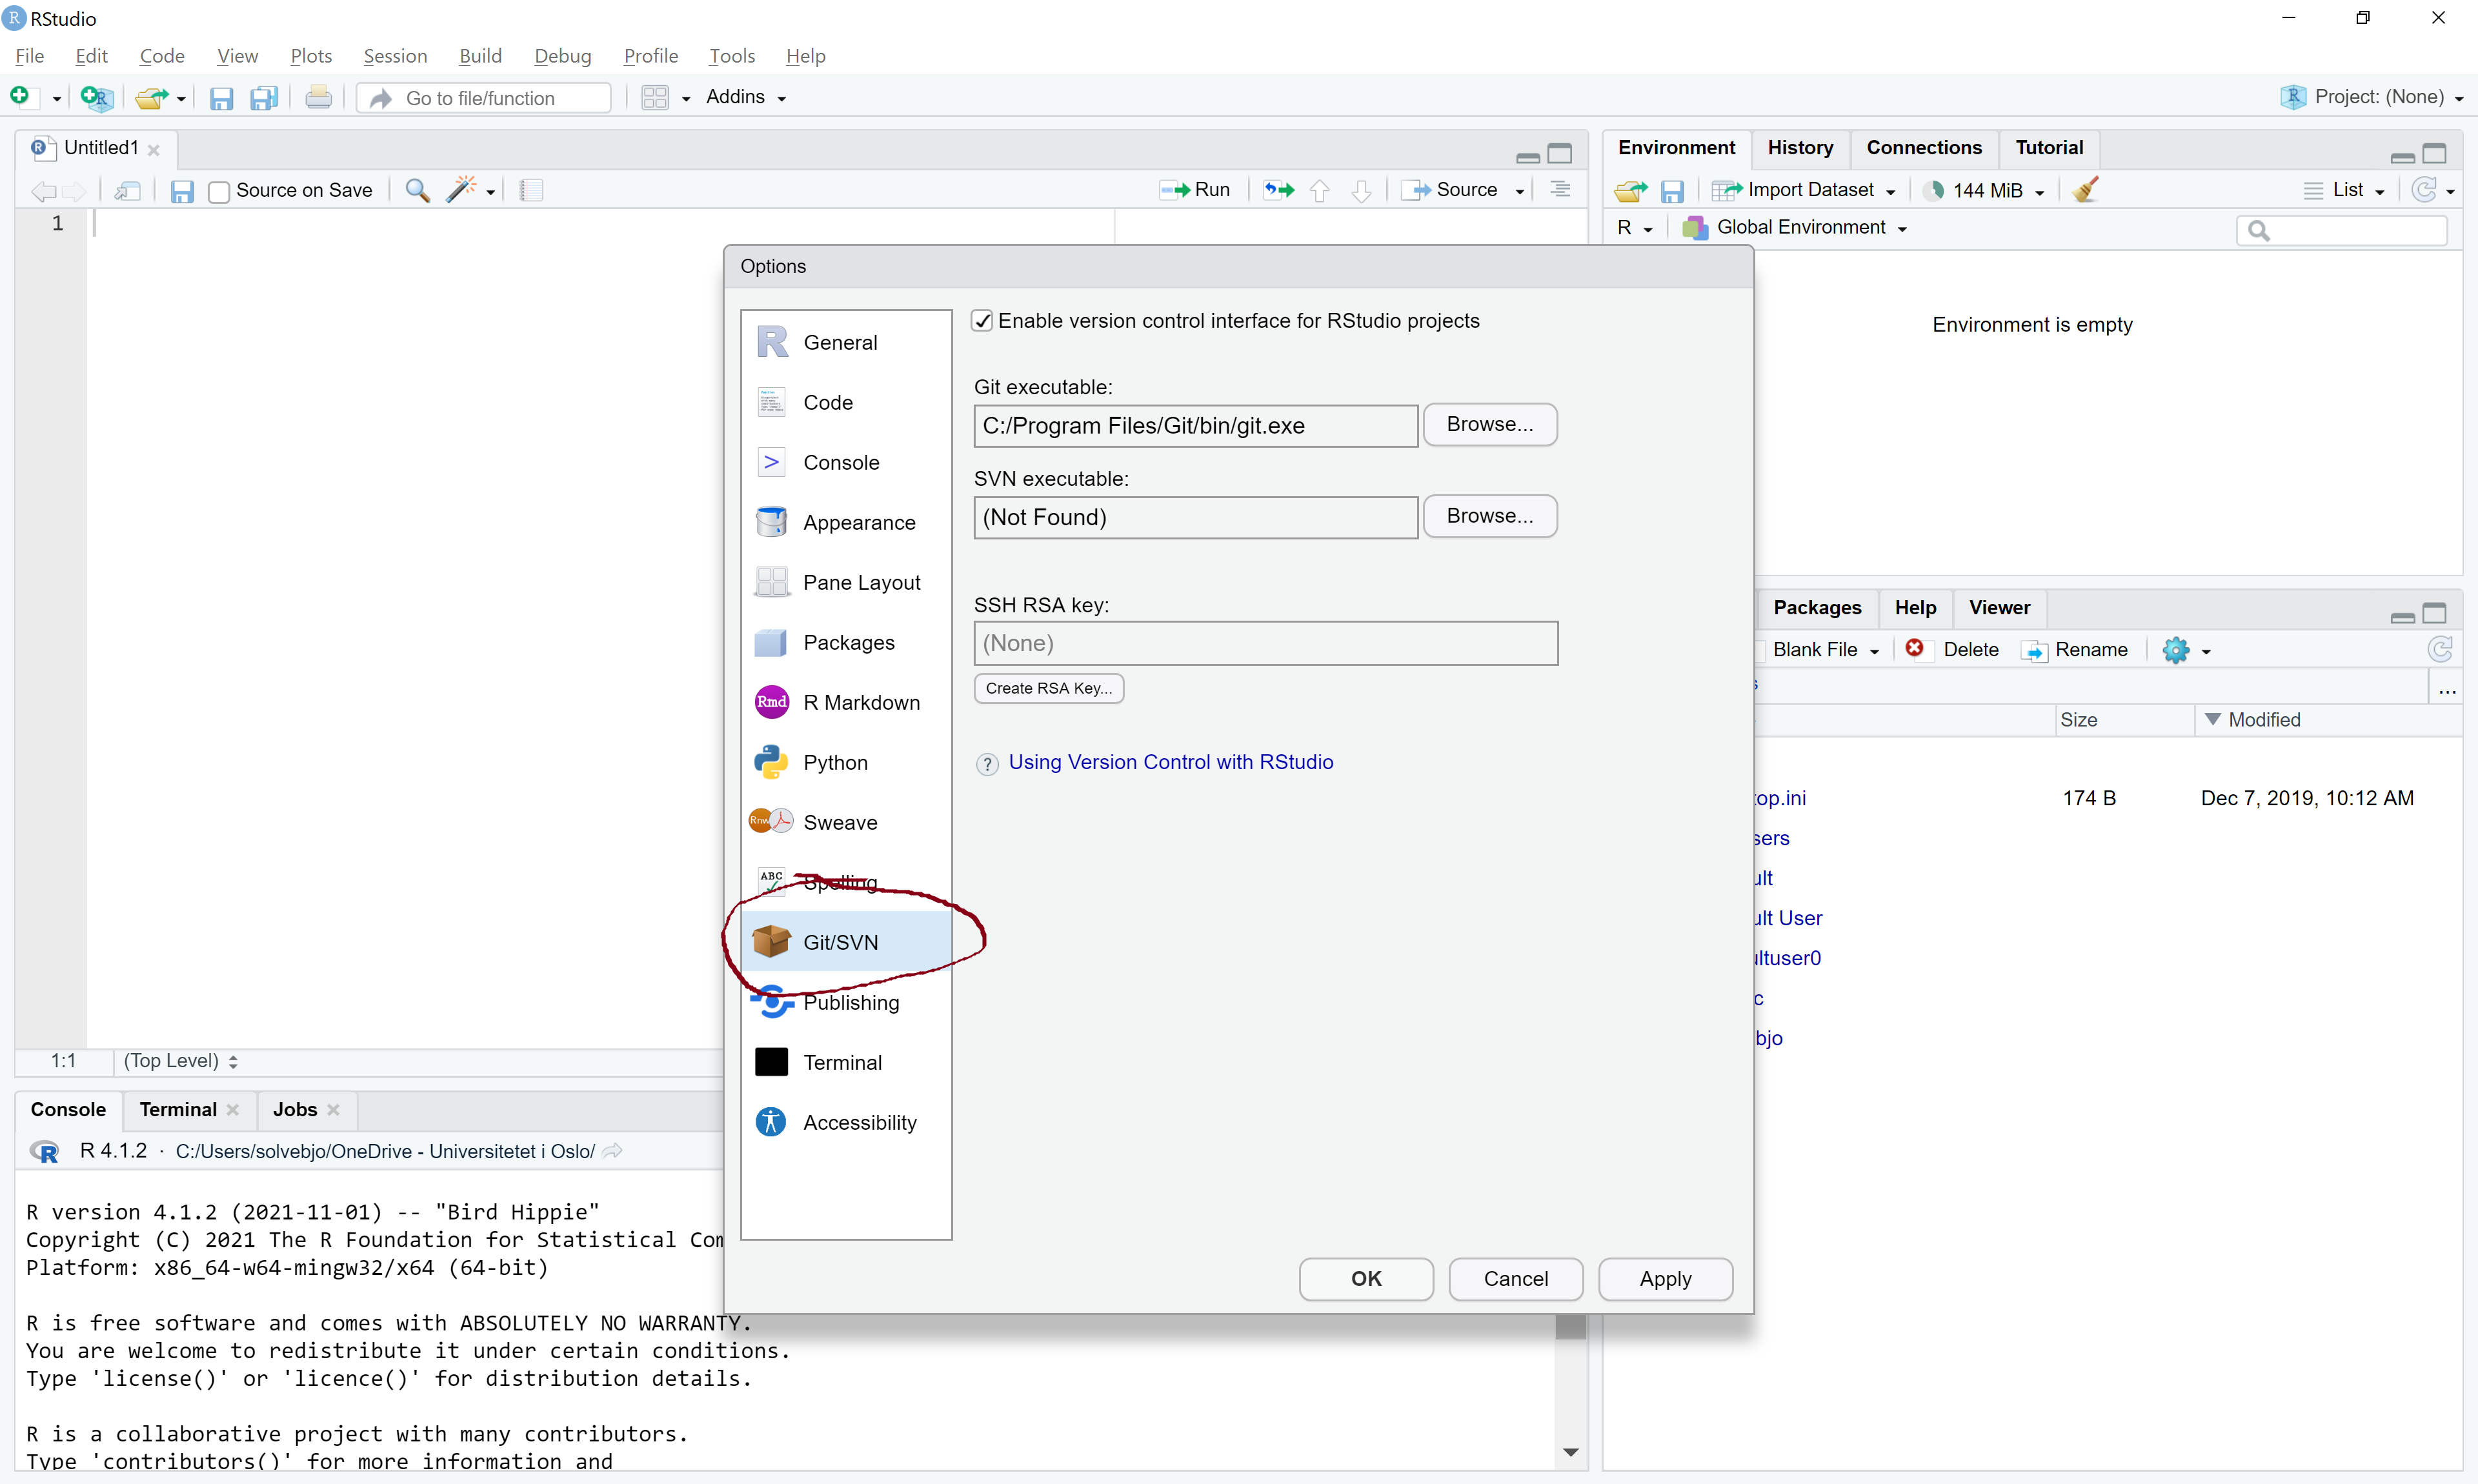
- Click Git/SVN.
- Click Enable version control interface for RStudio projects.
- Under “Git executable”, if there is no path there, enter the path for your the git file that you downloaded earlier.
When this is up and working, we need to use our newly installed git to do the actual cloning the Github repository to our own computer. To do this, you need to create a new project in RStudio that is tied to the repository. This is how to do that:
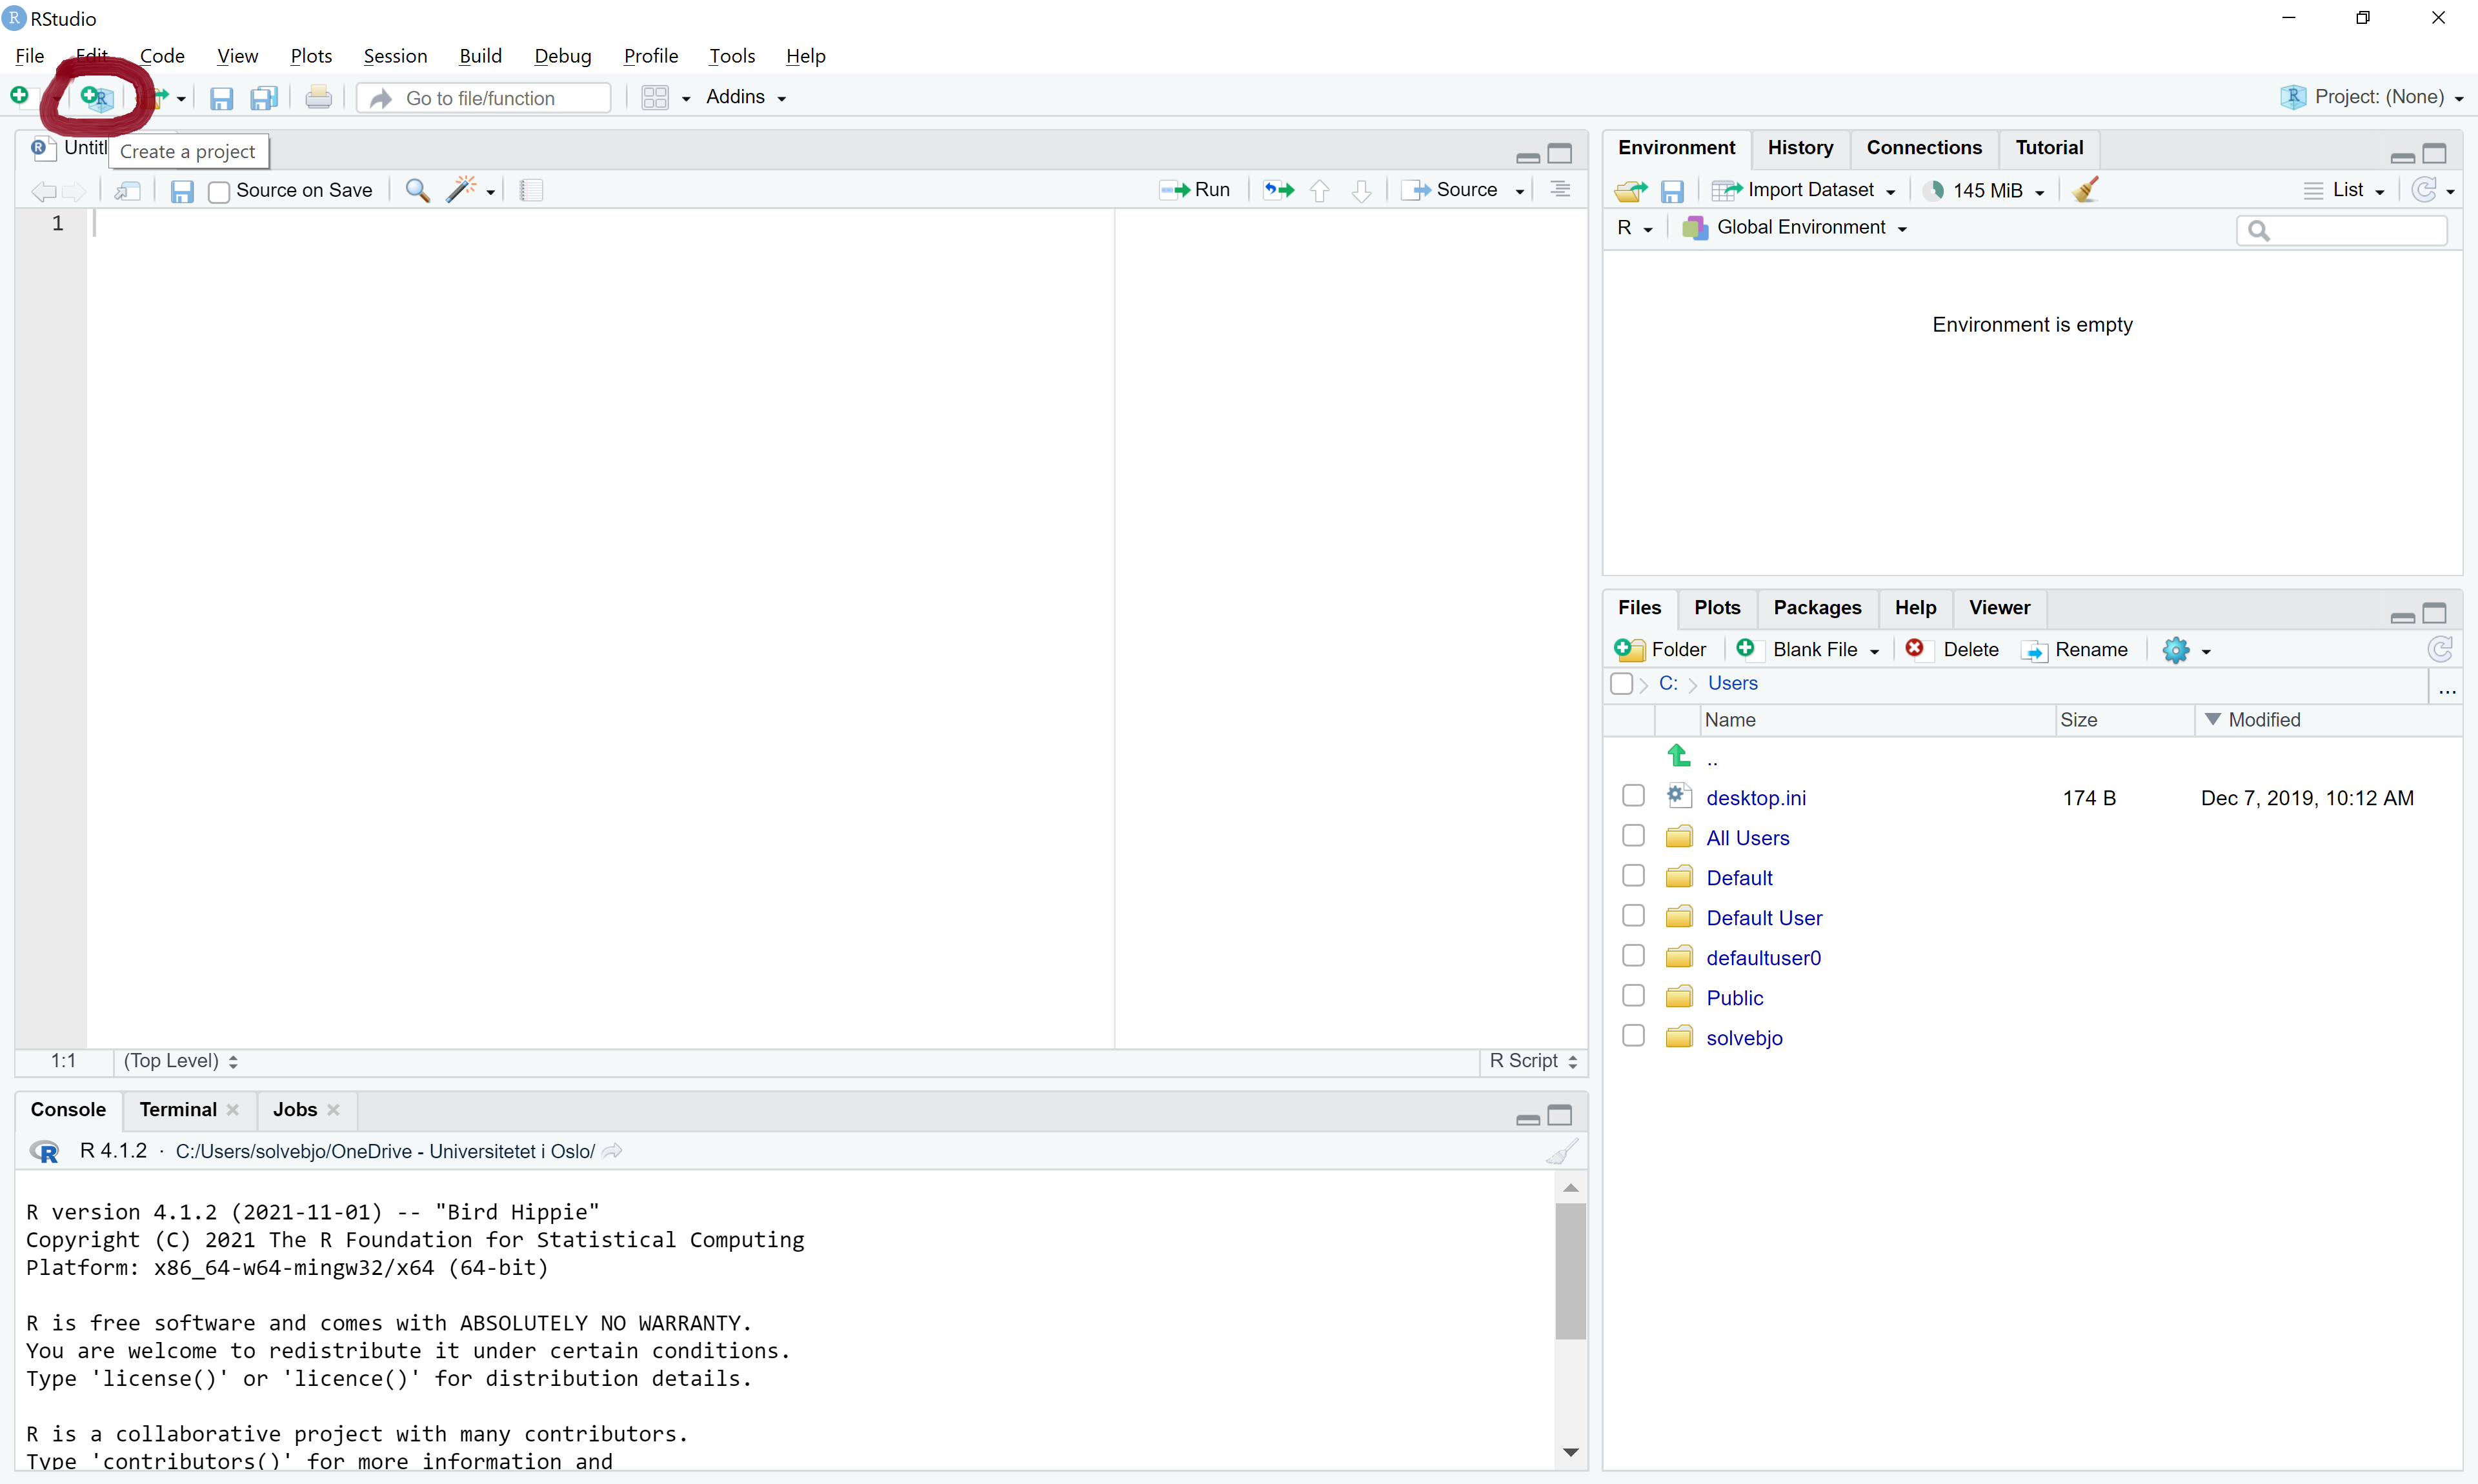
- Under “File” in the upper left hand corner of your RStudio, choose “New project”. Alteratively, click on the icon of an R in a box with a green plus sign.
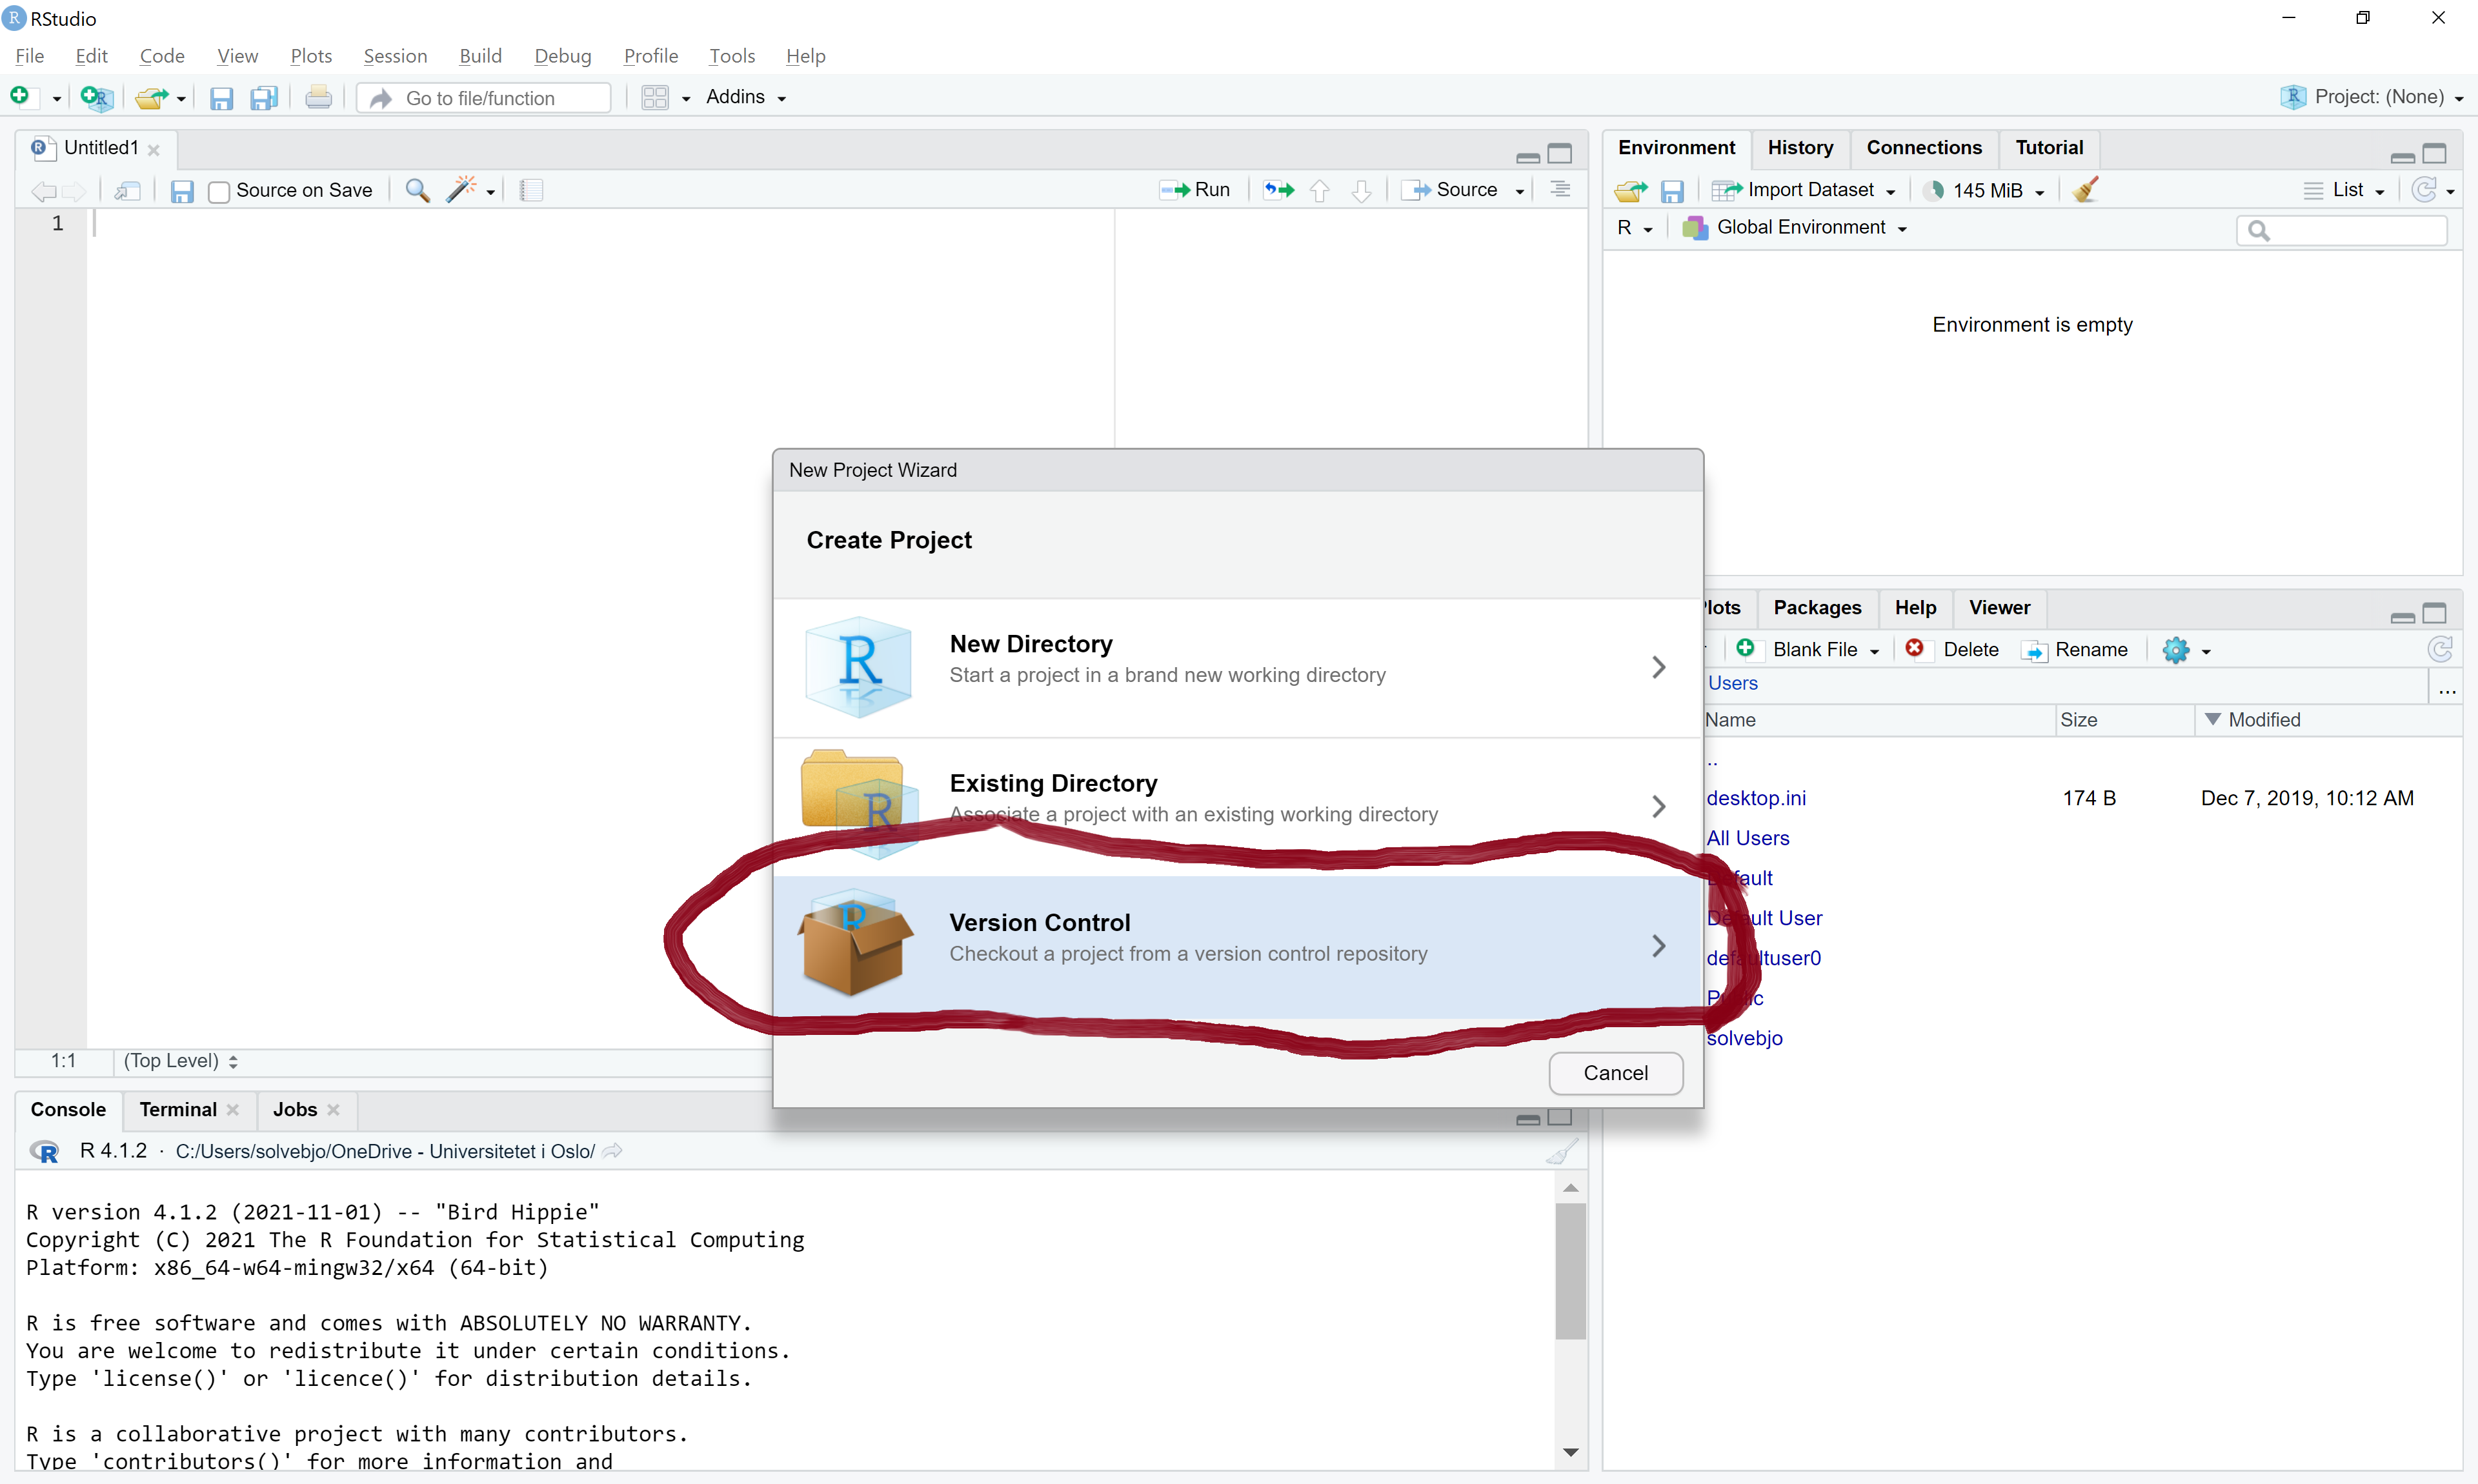
- Choose “Version Control”.
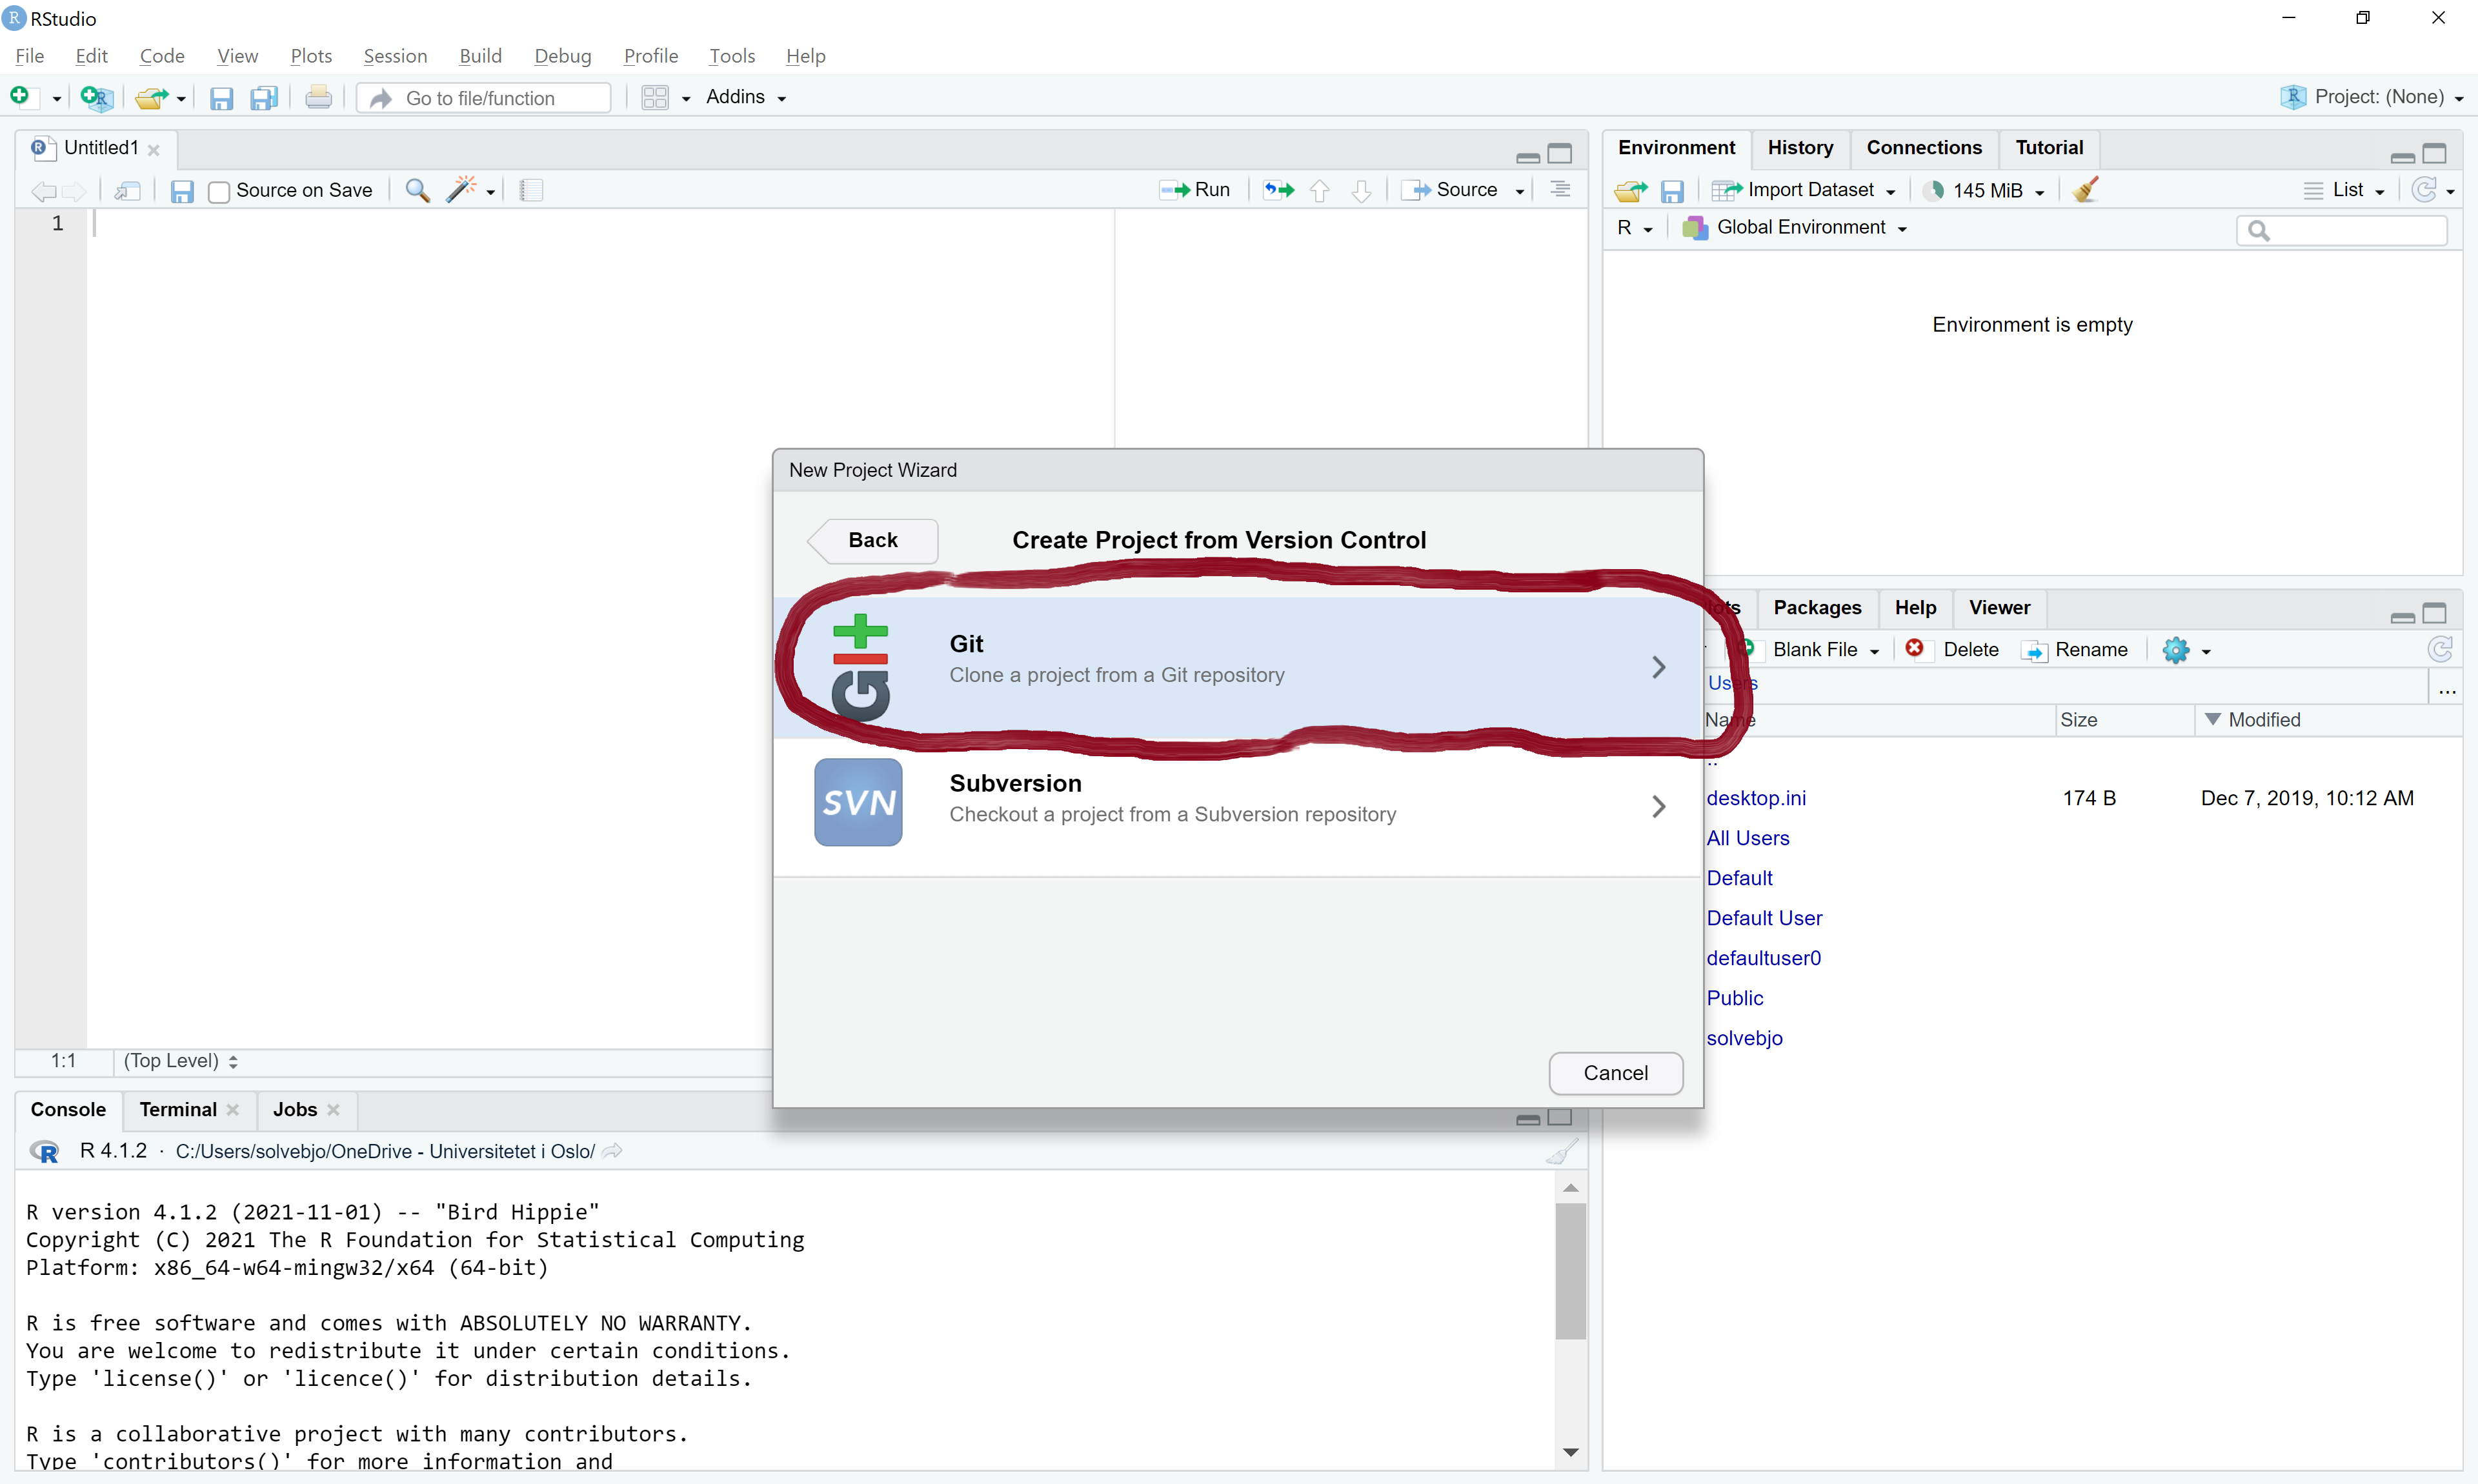
- Choose “Git”.
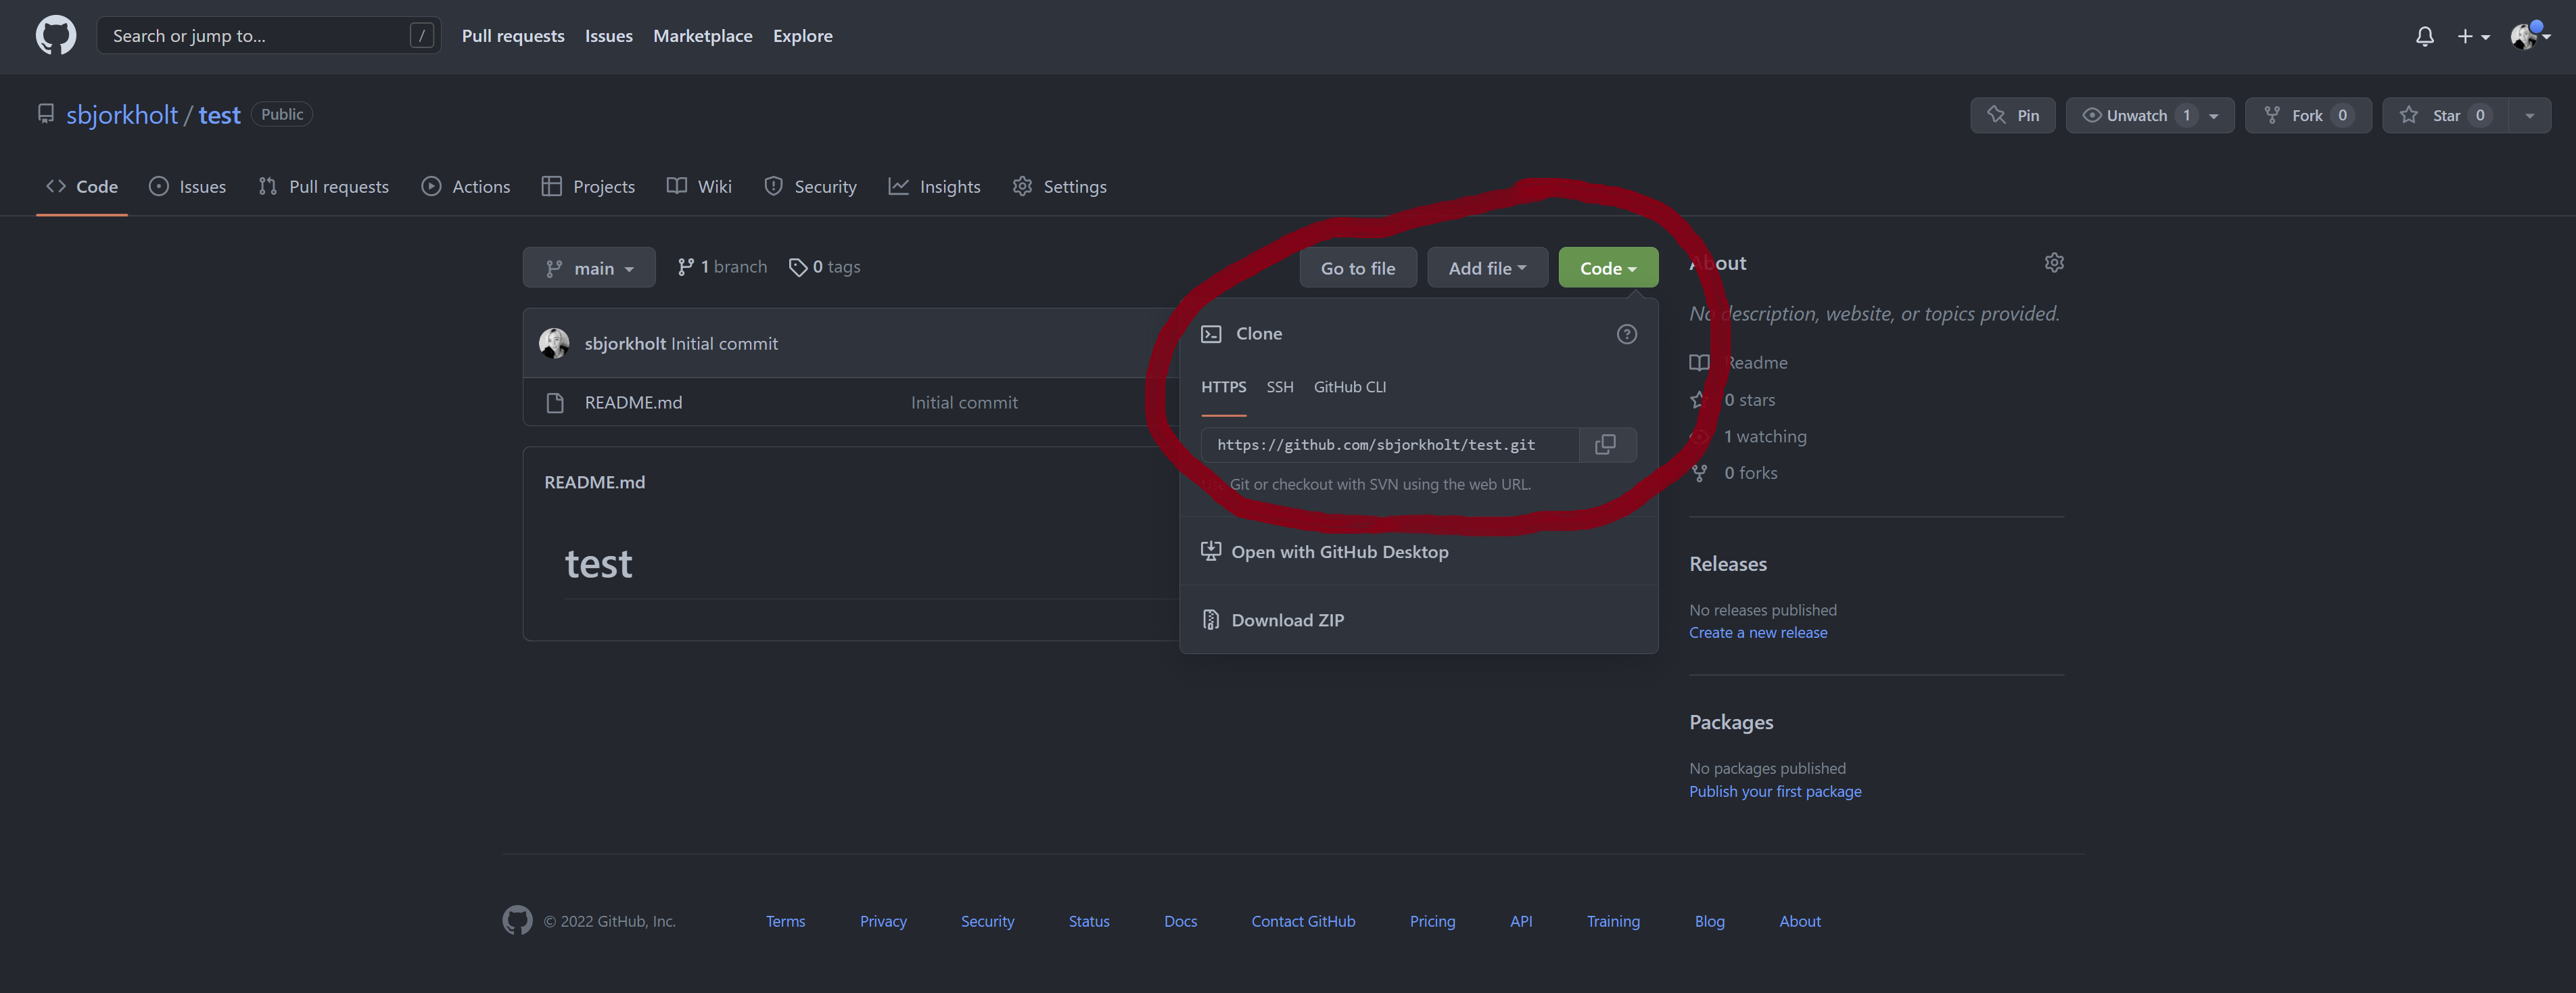
- Here, you are asked for the Repository URL. To find that, go back to the main page in your Repository in Github, and click on the green “Code” button. Copy the URL-path shown there. Then, paste it into the space for your Repository URL in RStudio.
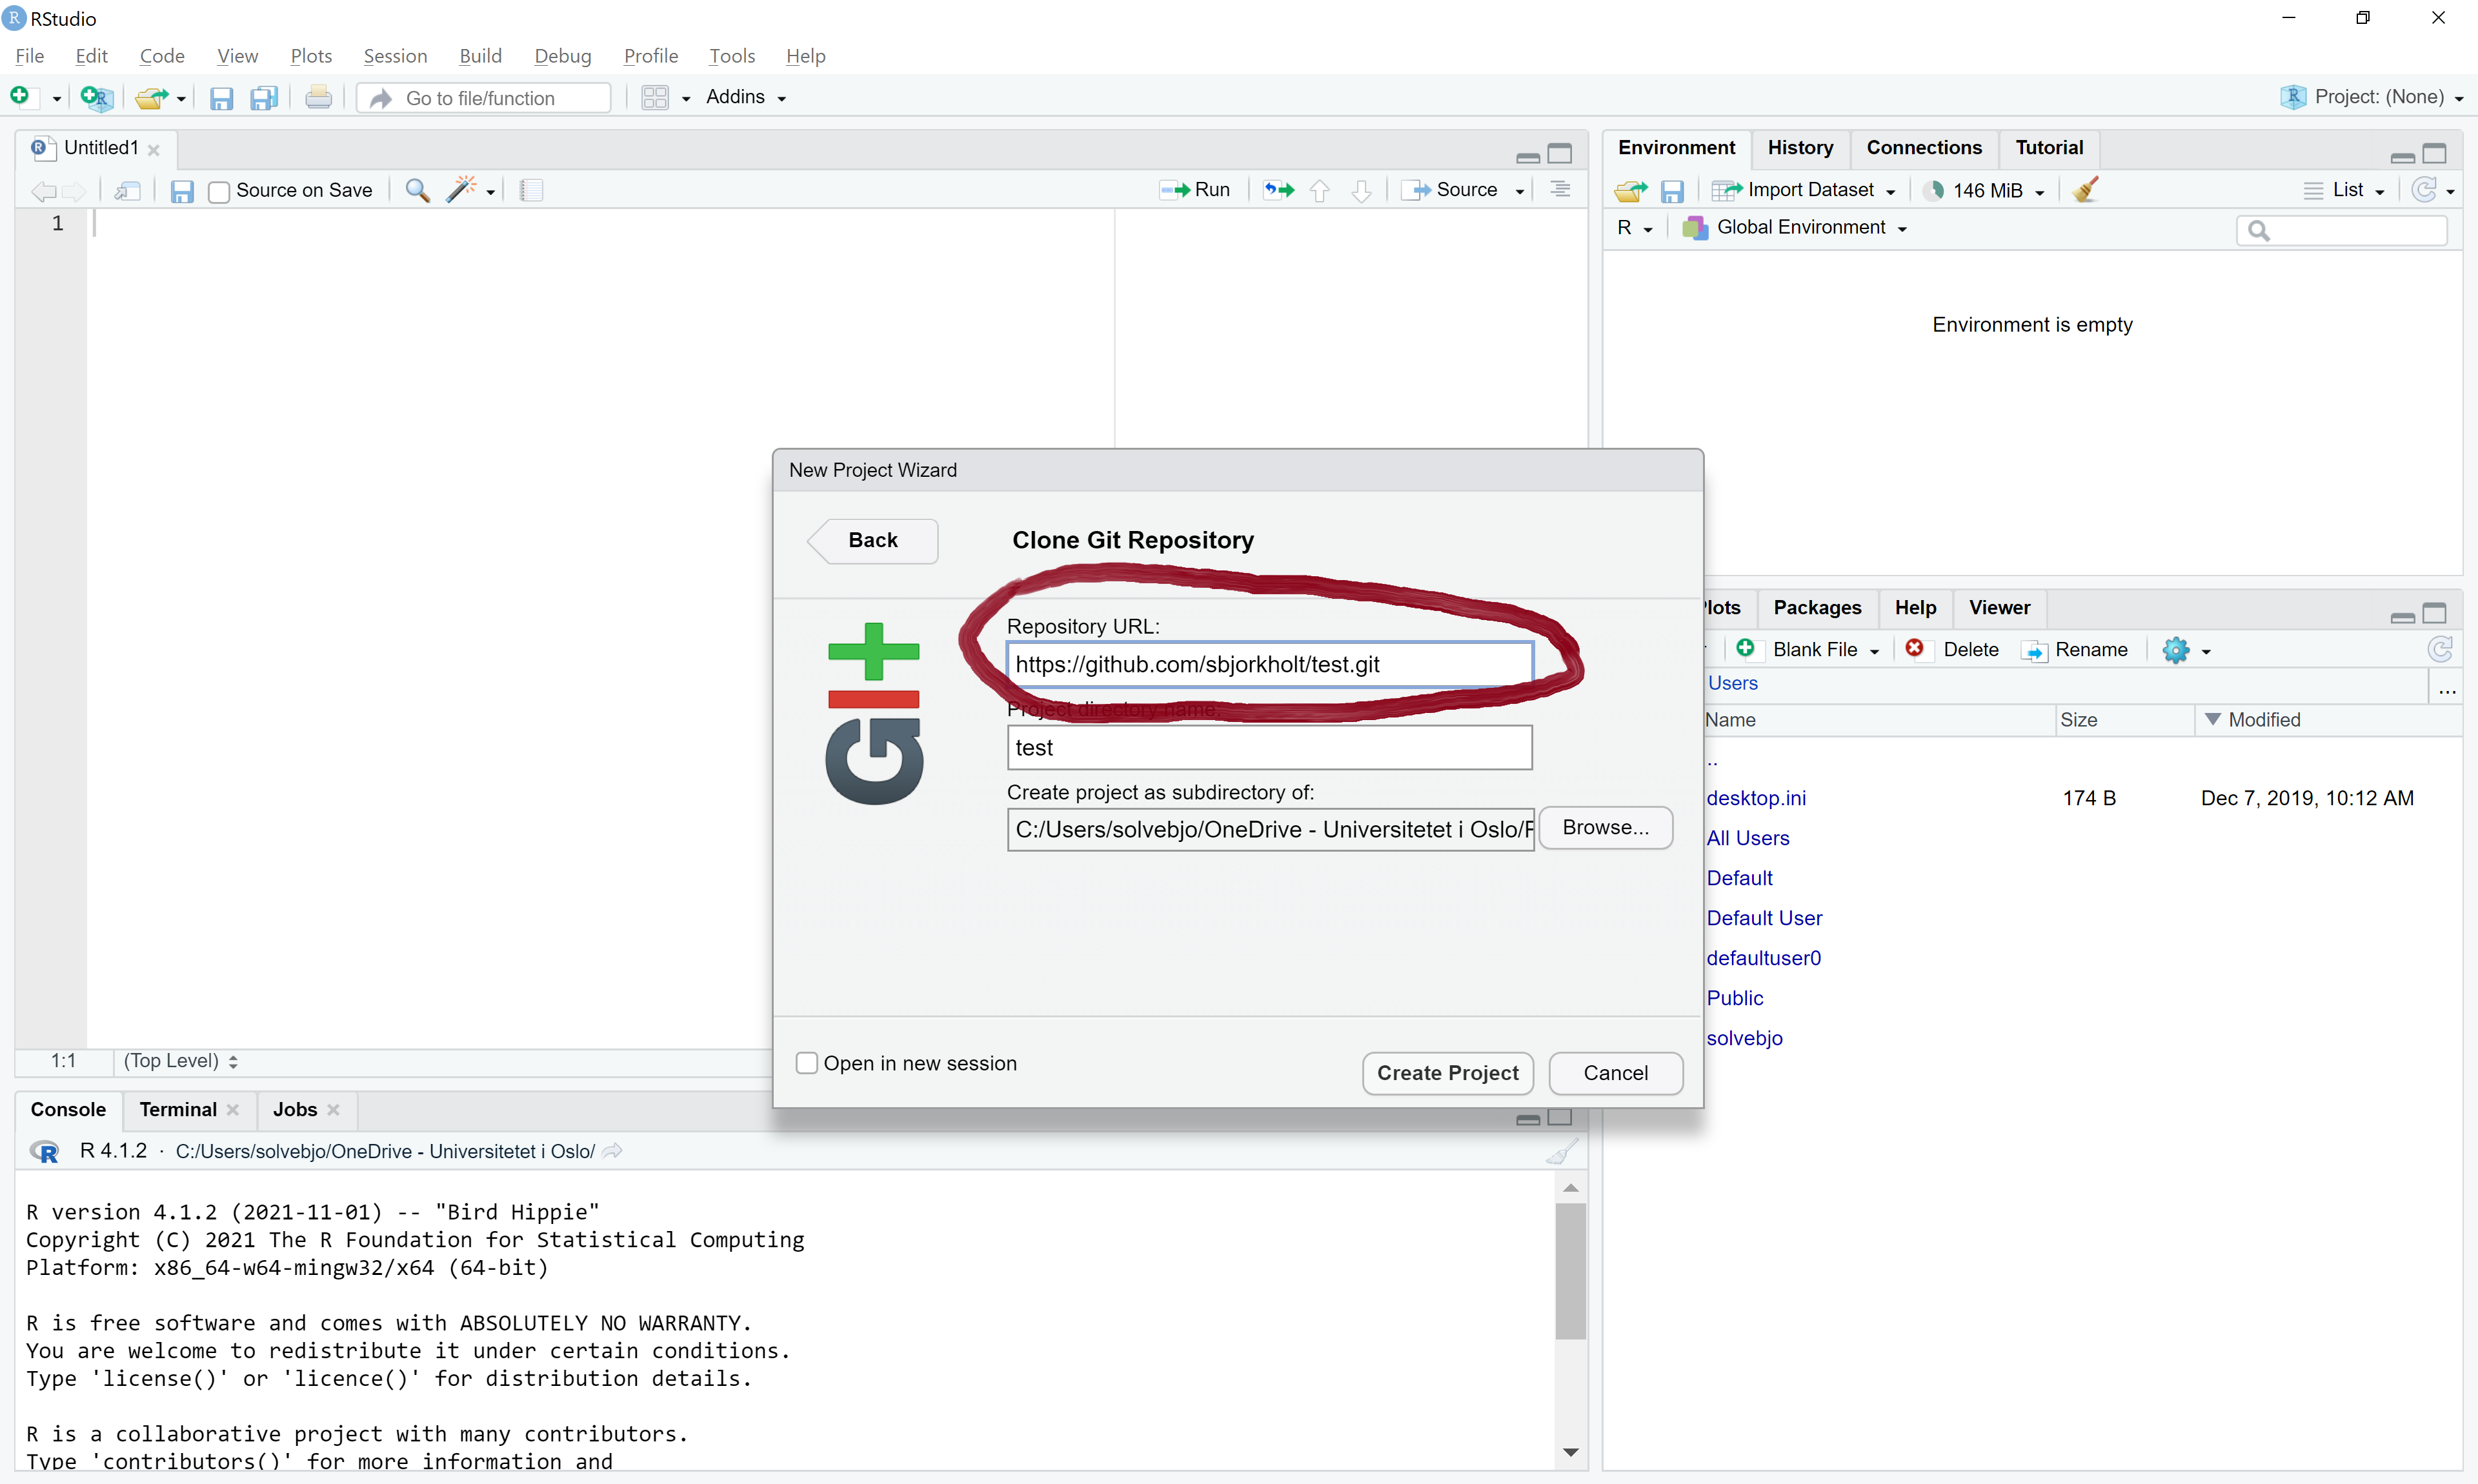
- Use the “Browse” button to choose where on your computer you want to place your folder. It should be a place you can easily find again. And it should not be under “Downloads”. Recall that a Repository in Github is kind of like a folder, so when you clone the repository like this, you will create a folder on your computer that matches the folder on Github.
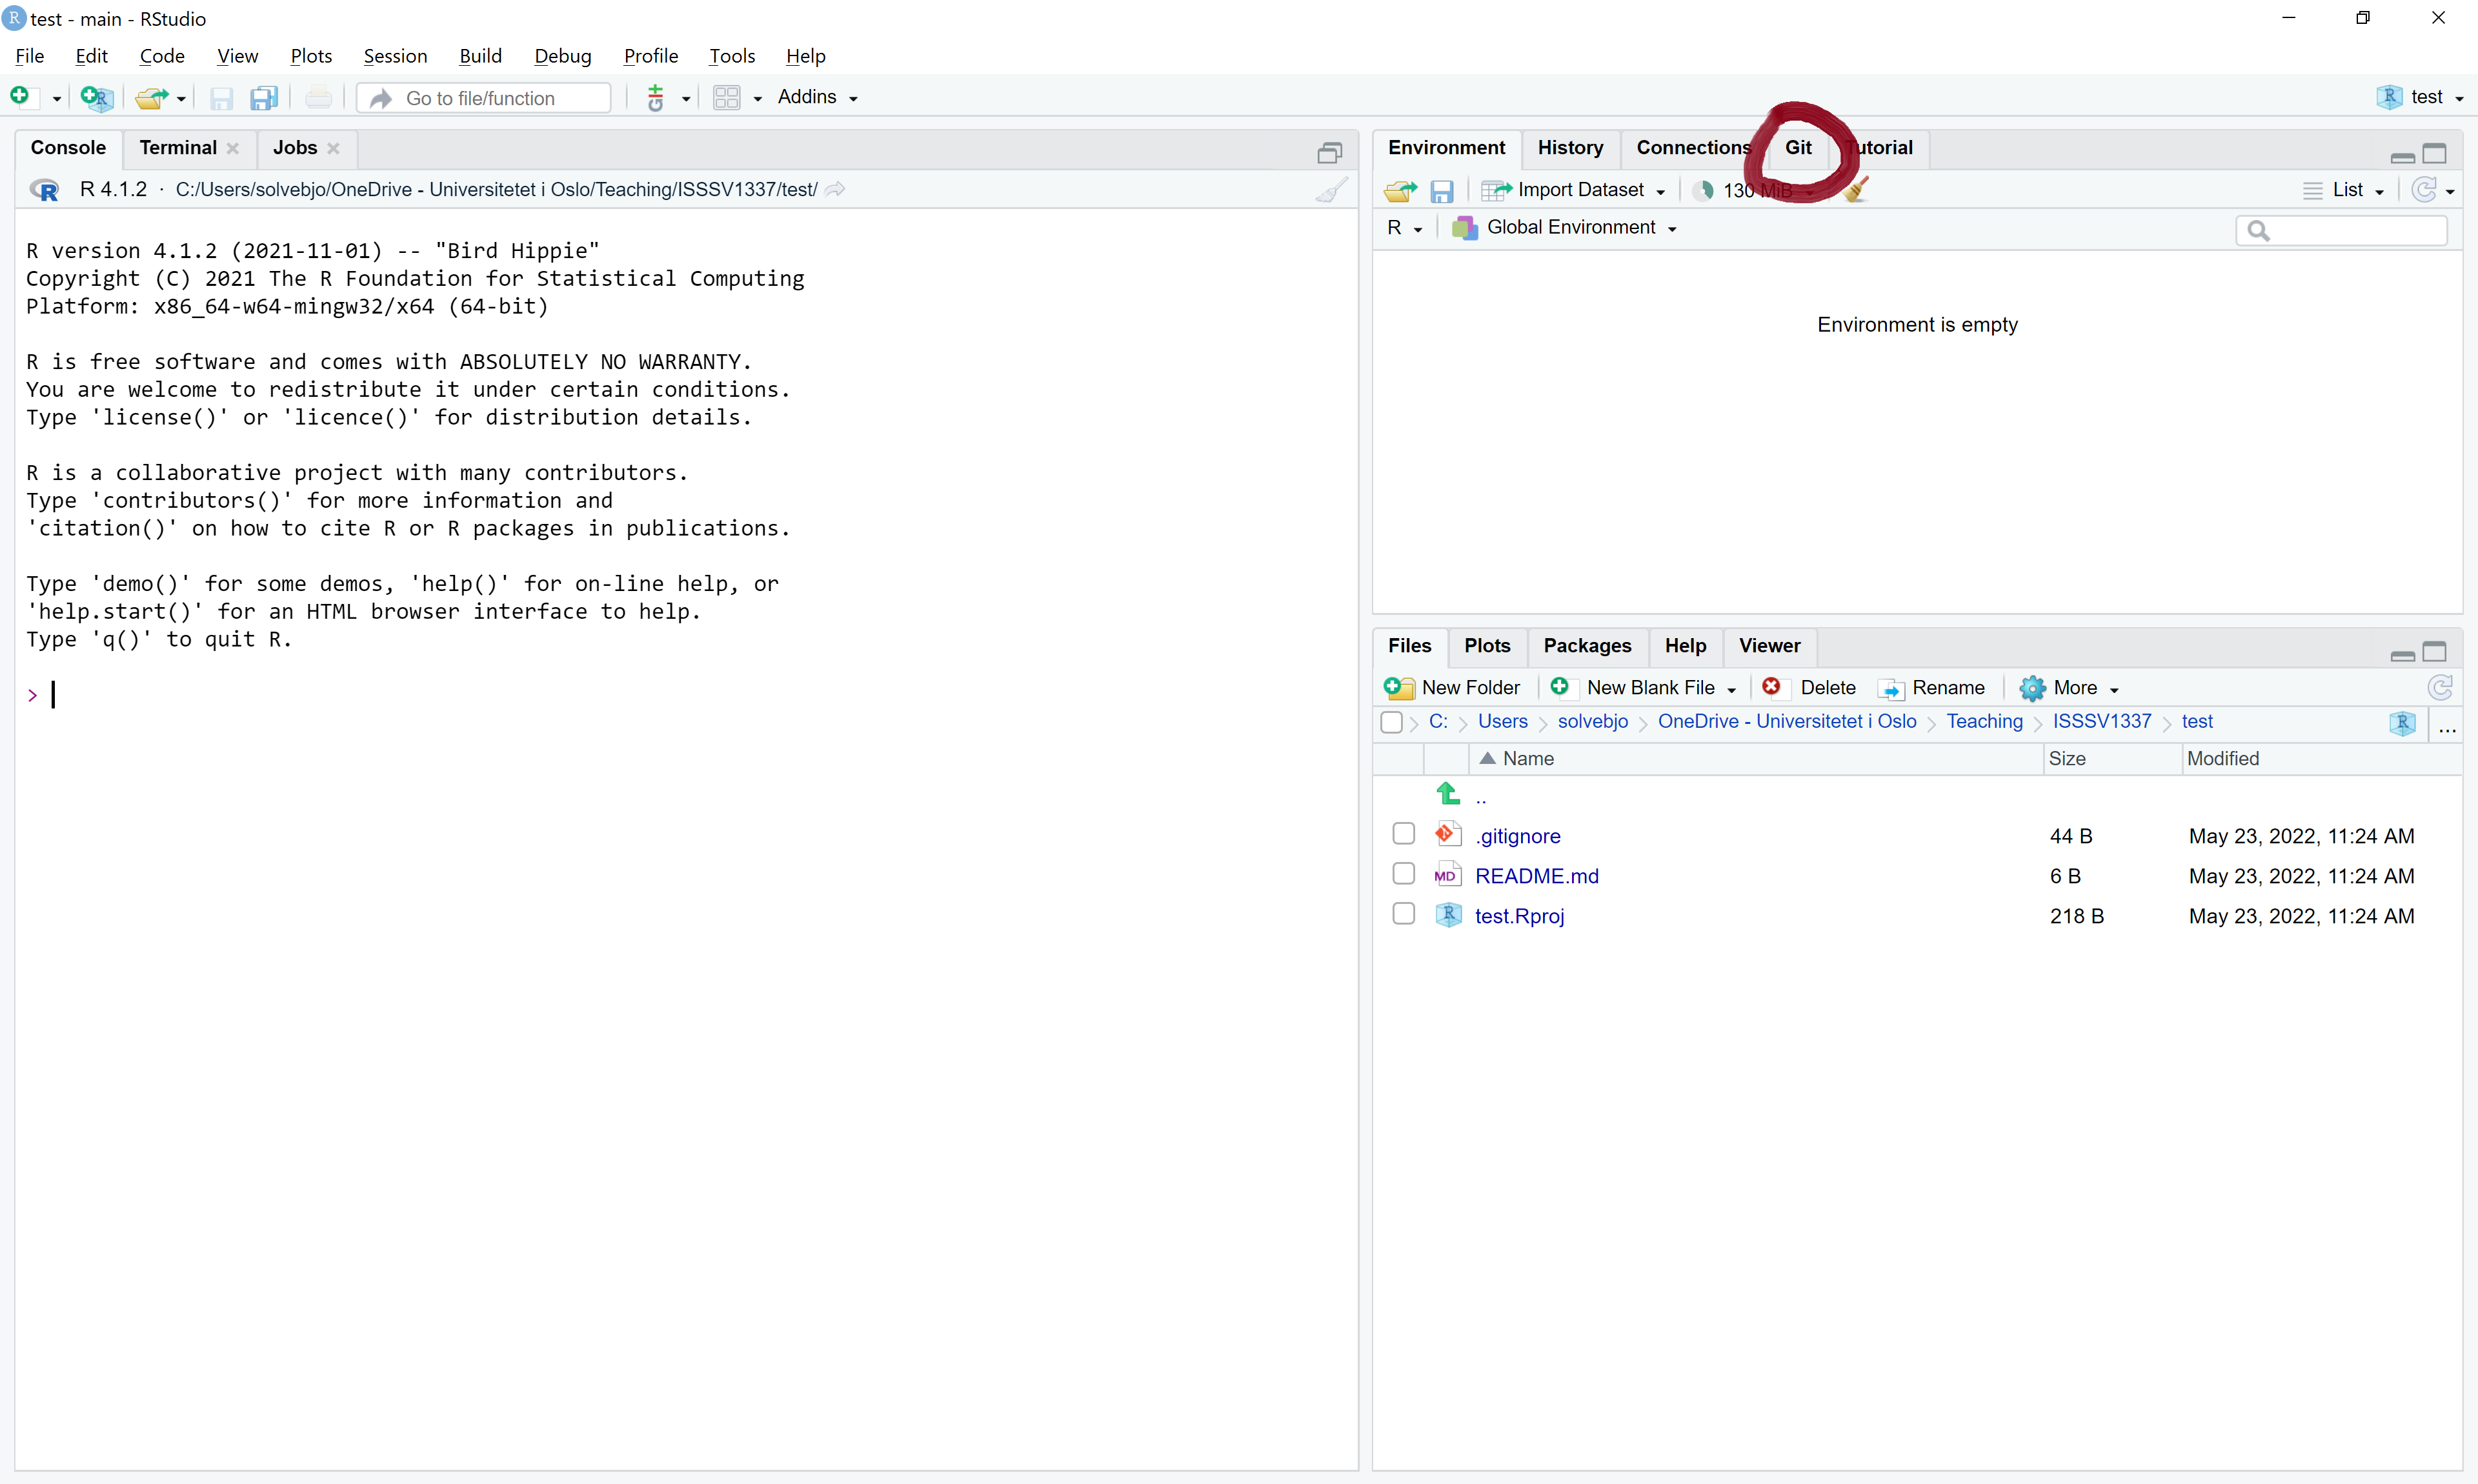
And now, you’ve successfully cloned the Github repository to your own computer. In the upper right hand corner of your Rstudio, there is now a tab called “Git”. Moreover, in the bottom right hand corner, under “Files”, you find the folder on your computer which matches the Github repository.
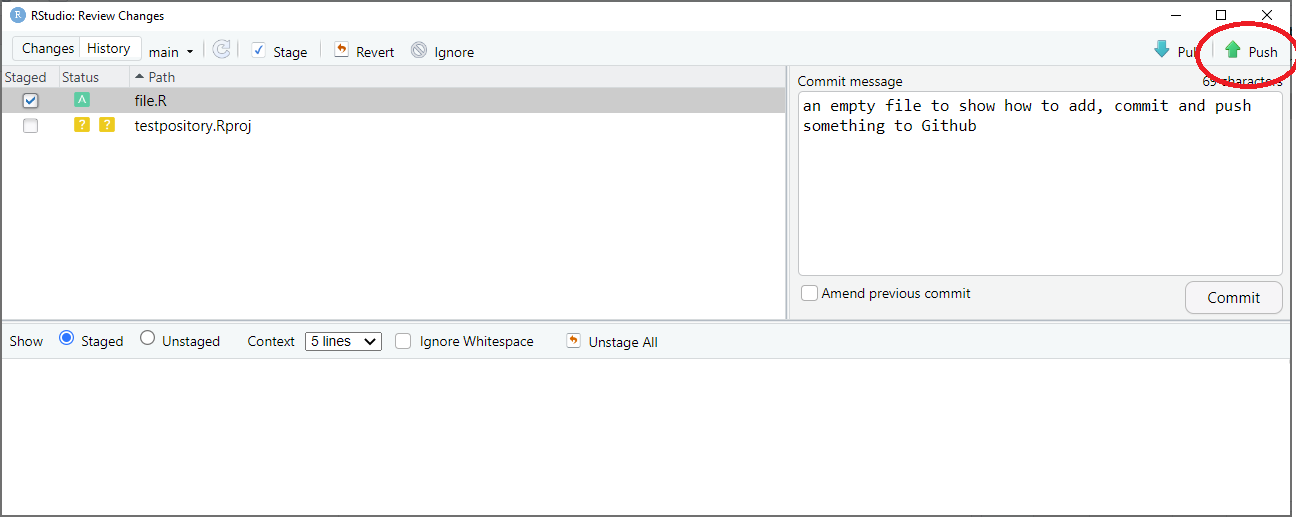
To get the latest updates from your repository, click “Pull”. Make it a habit to click “Pull” regularly. It will spare you the pain of so-called “merge conflicts”. If you want to add your code to the common repository:
- Click “Pull”.
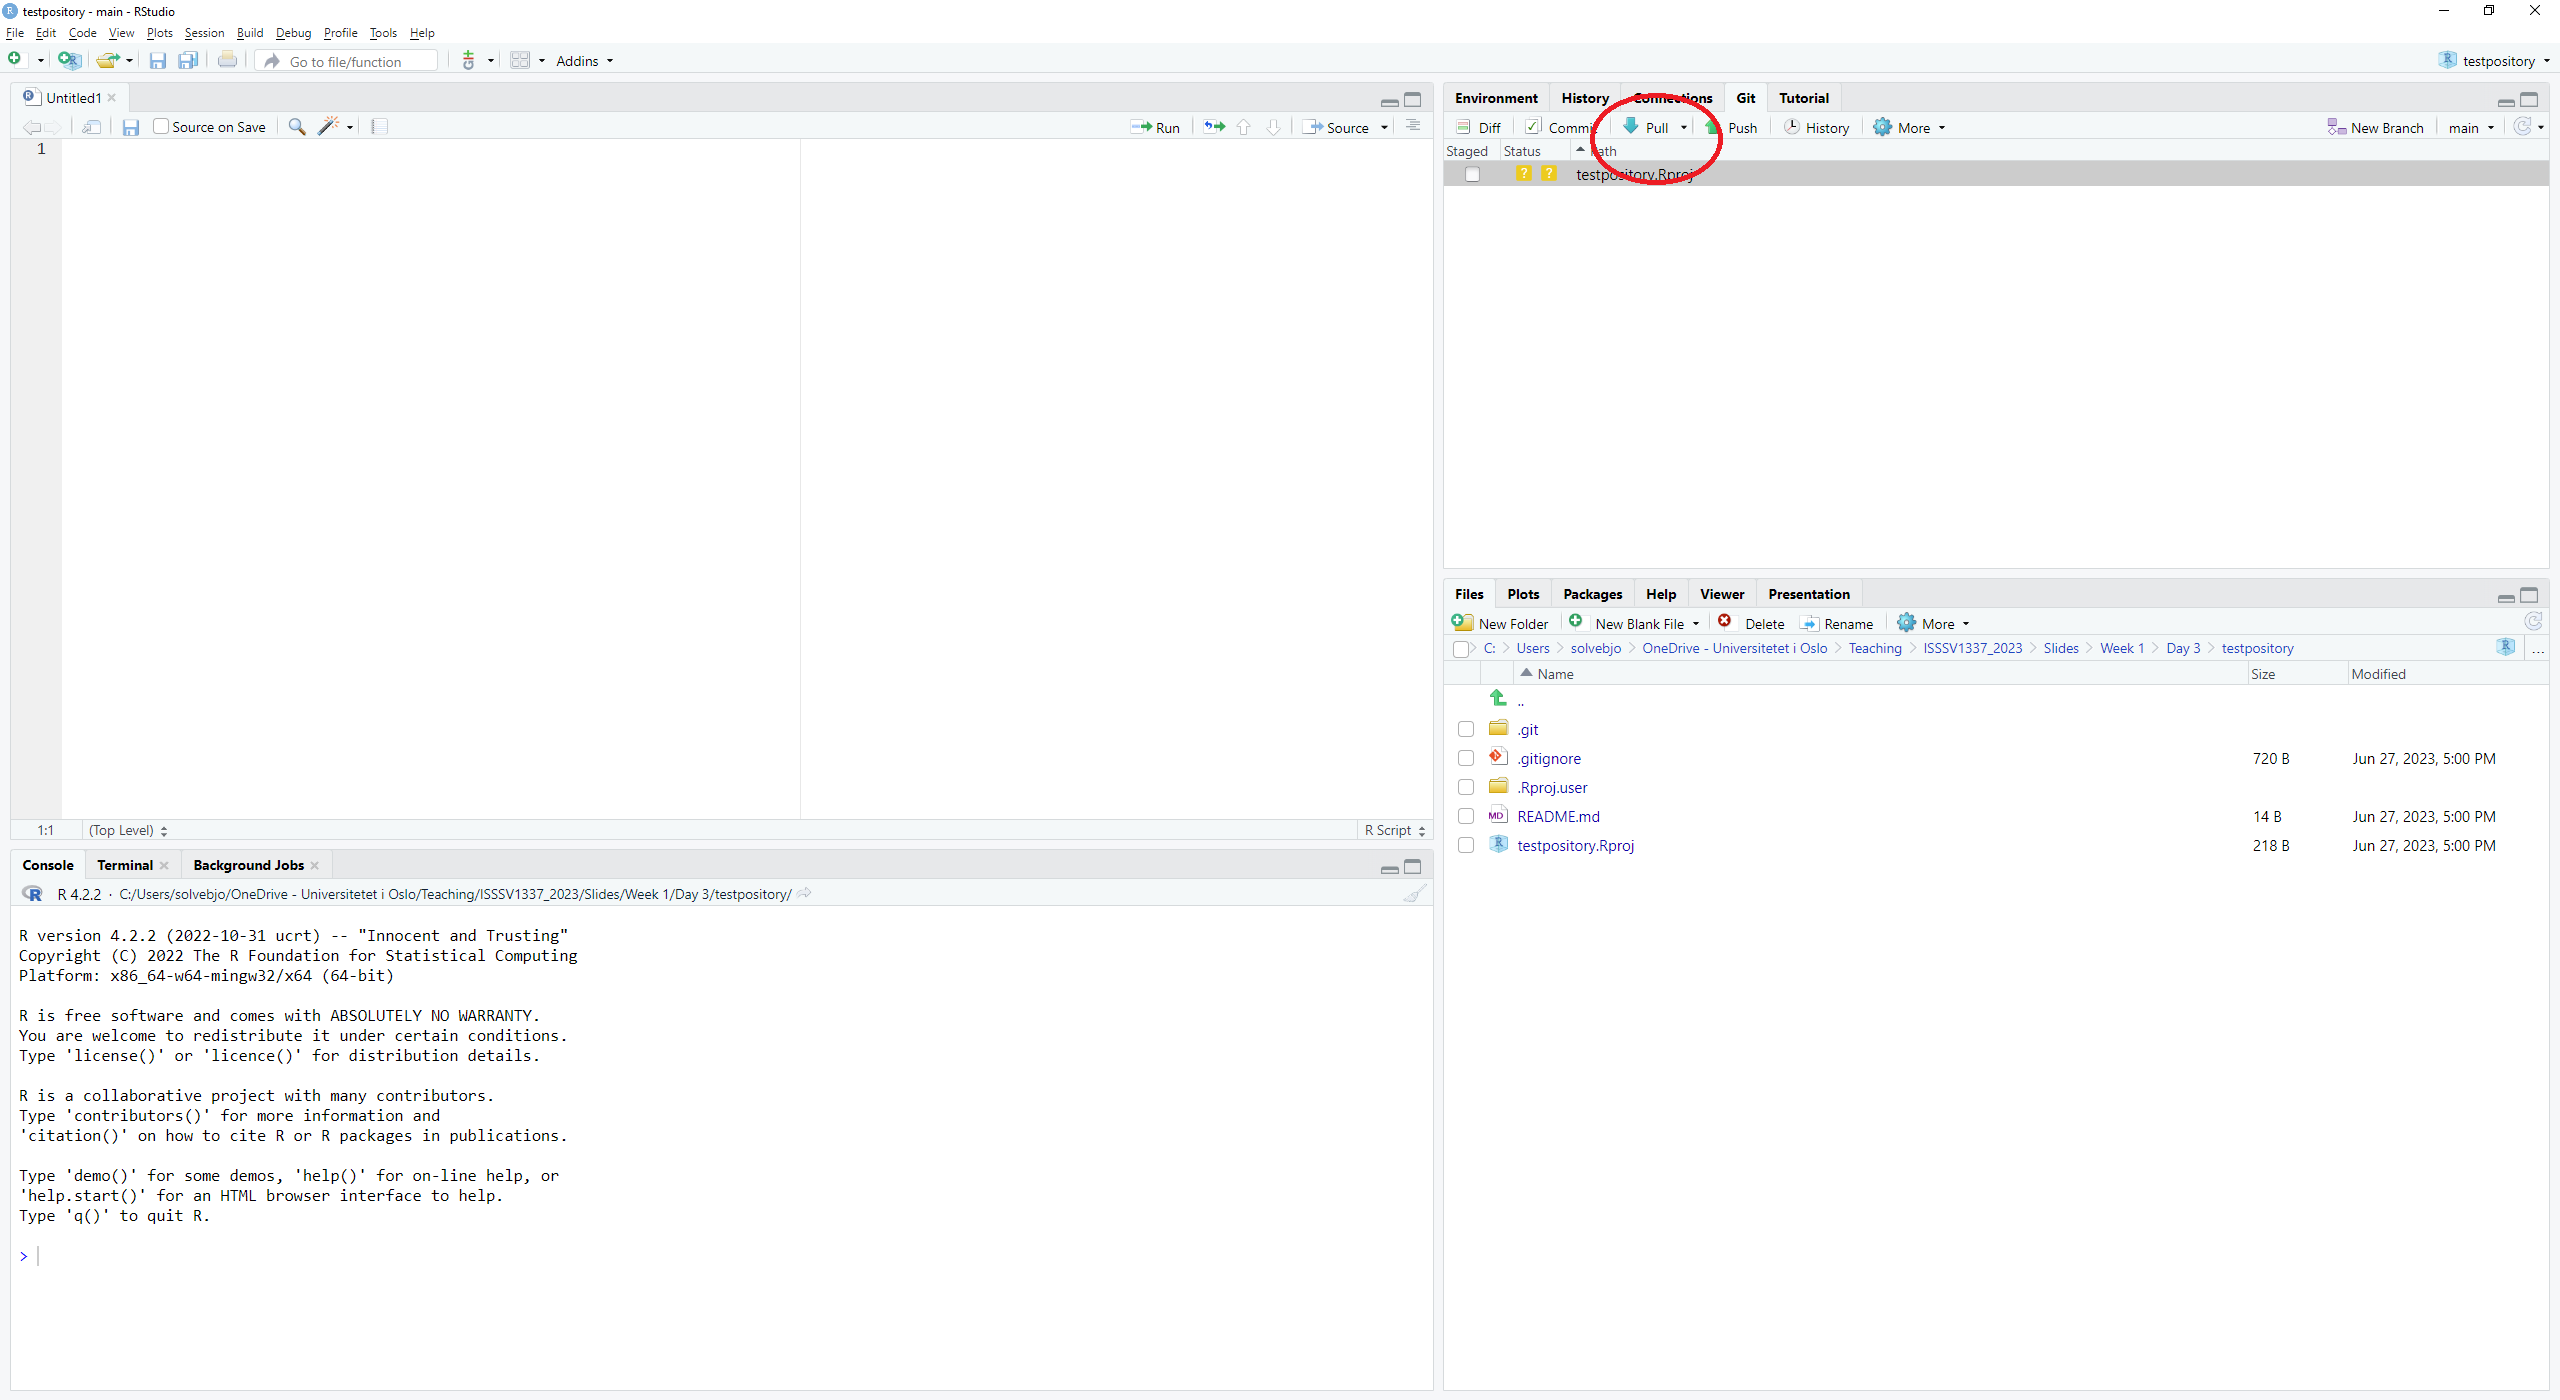
- Add your file by clicking the box on its left hand side in the right-top panel.


- Click “Commit”.

- Add a description of what you’ve done and why and click “Commit”.
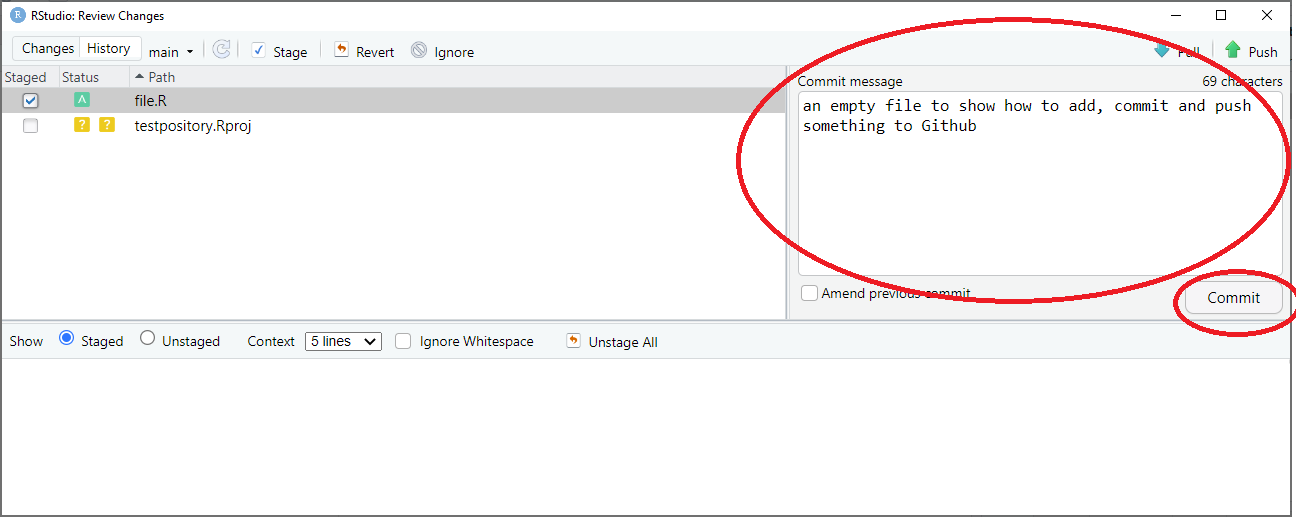
- Click “Push”.